Welcome to the JLab manual. This guide introduces JLab’s purpose‚ safety protocols‚ equipment‚ experimental design‚ data collection‚ reporting‚ and troubleshooting. It serves as a comprehensive resource for conducting experiments safely and effectively.
1.1. What is JLab?
JLab is a state-of-the-art research facility designed to support scientific experimentation and innovation. It provides a collaborative environment for scientists‚ researchers‚ and students to explore cutting-edge technologies and methodologies. Equipped with advanced tools and instruments‚ JLab fosters interdisciplinary approaches to problem-solving and discovery. The facility emphasizes safety‚ precision‚ and ethical practices‚ ensuring a productive and secure workspace for all users. JLab is intended to bridge the gap between theoretical knowledge and practical application‚ offering resources for both basic and applied research. Whether for academic‚ industrial‚ or experimental purposes‚ JLab serves as a comprehensive platform to advance scientific understanding and achieve groundbreaking results.
1.2. Purpose of the JLab Manual
The JLab manual is a comprehensive guide designed to ensure safe‚ efficient‚ and effective use of the JLab facility. It provides detailed instructions‚ protocols‚ and best practices for conducting experiments‚ maintaining equipment‚ and following safety procedures. The manual serves as a primary resource for all users‚ from novice researchers to experienced scientists‚ to familiarize themselves with JLab’s operational standards. It covers essential topics such as safety protocols‚ equipment usage‚ experimental design‚ data collection‚ and troubleshooting. By adhering to the guidelines outlined in this manual‚ users can maximize their productivity while minimizing risks. The JLab manual is regularly updated to reflect advancements in technology and changes in regulatory requirements‚ ensuring that it remains a reliable and up-to-date reference for all JLab activities.

Safety Protocols in JLab
Safety is a top priority in JLab. This section outlines essential protocols‚ including proper use of PPE‚ emergency procedures‚ and general guidelines to ensure a secure working environment for all personnel.
2.1. General Safety Guidelines
Adherence to safety protocols is paramount in JLab. All personnel must follow guidelines to minimize risks. Key measures include proper hazard identification‚ use of appropriate attire‚ and safe handling of equipment. Ensure all chemicals are labeled and stored correctly. Familiarize yourself with emergency exits and equipment locations. Report any unsafe conditions immediately. Regular training sessions are mandatory to maintain awareness and compliance. Always follow established procedures for handling materials and tools. Maintain a clean workspace to prevent accidents. Be mindful of electrical safety and avoid overloading circuits. Properly dispose of waste according to JLab regulations. Stay alert and avoid distractions while conducting experiments. Collaboration and communication among team members are essential for a safe environment. Remember‚ safety is everyone’s responsibility in JLab.
2.2. Personal Protective Equipment (PPE)
Personal Protective Equipment (PPE) is essential for safeguarding against hazards in JLab. Always wear lab coats‚ gloves‚ and closed-toe shoes when handling materials. Goggles or safety glasses are required for eye protection during chemical or biological procedures. Face shields may be necessary for additional protection in high-risk scenarios. Ensure PPE is properly fitted and suitable for the specific task. Dispose of disposable PPE after use and decontaminate reusable items. Familiarize yourself with PPE selection guidelines based on hazard assessments. Never reuse PPE intended for single use. Properly store PPE to maintain its effectiveness. Regularly inspect PPE for signs of wear or damage. Adherence to PPE protocols is critical to prevent injuries and exposures. Remember‚ PPE is the last line of defense in a safe working environment.
2.3. Emergency Procedures
In case of an emergency in JLab‚ follow established protocols to ensure safety. For fires‚ evacuate the area‚ activate the fire alarm‚ and use fire extinguishers if trained. Spills of hazardous materials require immediate containment using spill kits‚ followed by ventilation and cleanup by trained personnel. In case of chemical exposure‚ flush affected areas with water and seek medical attention. For equipment malfunctions‚ disconnect power and notify supervisors. Evacuate the lab if there is a gas leak or structural damage. Always know the location of emergency exits‚ fire extinguishers‚ and first aid kits. Notify emergency services via the lab’s communication system. After an incident‚ document details and conduct a review to prevent recurrence. Familiarize yourself with these procedures during training to respond effectively in critical situations. Preparedness is key to minimizing risks and ensuring a safe environment for all lab users.

Equipment and Tools in JLab
This section covers the equipment and tools available in JLab‚ including common instruments‚ specialized devices‚ and their proper usage. It ensures safe and efficient experimentation.
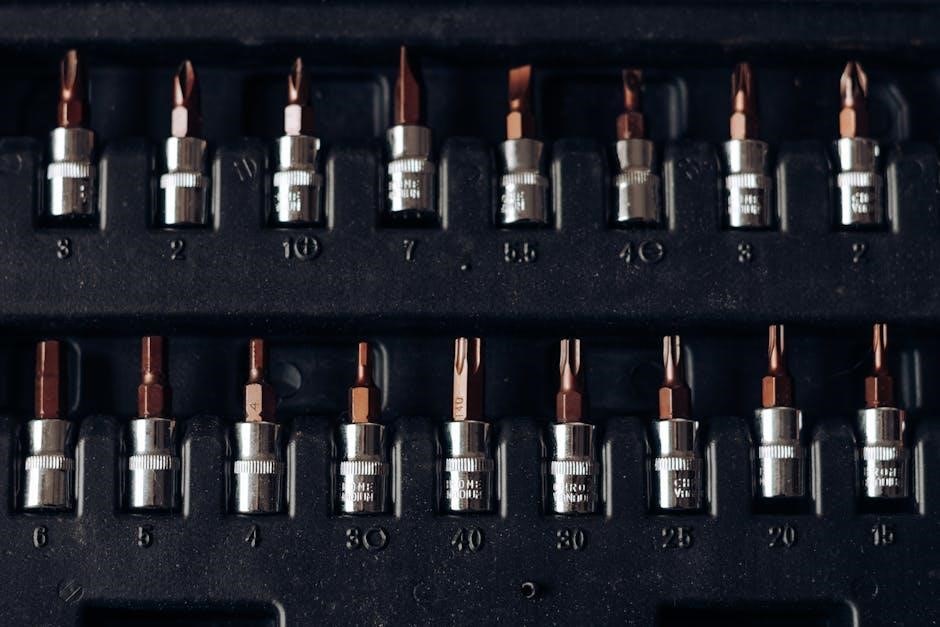
3.1. Common Lab Equipment
In JLab‚ common lab equipment includes microscopes‚ centrifuges‚ spectrophotometers‚ and thermocyclers. These tools are essential for conducting routine experiments. Microscopes are used for observing samples‚ while centrifuges separate substances based on density. Spectrophotometers measure light absorption‚ aiding in chemical analysis. Thermocyclers are crucial for PCR processes in molecular biology. Proper handling and maintenance of this equipment ensure accurate results and safety. Users must follow calibration procedures and safety protocols when operating these devices. Familiarizing yourself with these tools is key to efficient experimentation. Always refer to specific guidelines for each instrument to avoid errors and maintain functionality. Proper storage and cleaning are also vital to prolong equipment lifespan. By adhering to these practices‚ researchers can maximize the effectiveness of JLab’s resources and achieve reliable outcomes.
3.2. Specialized Tools and Instruments
JLab is equipped with advanced‚ specialized tools designed for precise and complex experiments. These include mass spectrometers‚ electron microscopes‚ and liquid chromatography systems. Mass spectrometers analyze molecular compositions‚ while electron microscopes provide high-resolution imaging at the nanoscale. Liquid chromatography systems are used for separating and identifying compounds in mixtures. These instruments require specialized training and handling to ensure accurate results. Regular calibration and maintenance are essential to uphold their performance. Users must adhere to specific protocols when operating these tools‚ as improper use can lead to equipment damage or inaccurate data. Proper documentation of settings and results is also crucial for reproducibility. Access to these instruments may require prior approval and scheduling. Familiarizing yourself with their operation and safety guidelines is vital for effective experimentation in JLab.
3.3. Equipment Calibration and Maintenance
Proper calibration and maintenance of equipment are critical for ensuring accuracy and reliability in experimental results. All instruments in JLab must be calibrated regularly according to manufacturer guidelines or after major repairs. Calibration involves verifying and adjusting equipment to meet specified standards. Maintenance tasks include cleaning‚ lubricating moving parts‚ and replacing worn components. Users are responsible for performing pre-use checks and reporting any malfunctions to the lab supervisor. A maintenance log should be kept for each piece of equipment‚ detailing the date‚ type of service‚ and technician involved. Neglecting calibration or maintenance can lead to inaccurate data‚ equipment damage‚ or safety hazards. Always refer to the equipment manual for specific instructions‚ and seek assistance from trained personnel if unsure. Regular maintenance ensures optimal performance and extends the lifespan of JLab’s instruments.
Experimental Design in JLab
Experimental design in JLab involves defining clear research objectives‚ selecting appropriate methods‚ and considering ethical implications to ensure experiments are conducted systematically and yield reliable results.
4.1. Defining Research Objectives
Defining research objectives is a critical step in experimental design. Clear objectives guide the experiment‚ ensuring focus and direction. They should be specific‚ measurable‚ achievable‚ relevant‚ and time-bound (SMART). Well-defined objectives help researchers stay focused‚ avoid unnecessary variables‚ and achieve meaningful results. Objectives should align with the broader goals of the study and be grounded in preliminary research or hypotheses. When formulating objectives‚ it is essential to avoid vague language and ensure they are testable and observable. This clarity enables the selection of appropriate methodologies and tools. Additionally‚ objectives should be documented in the lab manual to maintain accountability and consistency. By carefully defining research objectives‚ scientists can ensure their experiments are purposeful‚ efficient‚ and contribute effectively to their field of study.
4.2. Selecting Experimental Methods
Selecting appropriate experimental methods is crucial for achieving research objectives. Methods should align with the study’s goals‚ ensuring data collection is accurate and relevant. Researchers must evaluate various approaches‚ considering factors like reliability‚ validity‚ and feasibility. Practical considerations‚ such as time‚ budget‚ and available resources‚ also influence method selection. Standard methodologies are often preferred for consistency‚ but innovative approaches may be necessary for unique research questions. It is essential to document the rationale behind method selection in the lab manual. This transparency ensures reproducibility and accountability. By carefully choosing experimental methods‚ scientists can maximize the quality of their data and the credibility of their findings. Always ensure that methods are ethically sound and comply with JLab’s safety and ethical guidelines.
4.3. Ethical Considerations
Ethical considerations are fundamental to all research conducted in JLab. Researchers must ensure that experiments are designed and executed with integrity‚ respecting human‚ animal‚ and environmental welfare. Compliance with institutional and legal regulations is mandatory. Informed consent must be obtained for human subjects‚ and animal studies must adhere to ethical guidelines. Environmental impact should be minimized‚ and waste disposal must follow sustainable practices. Data integrity is paramount; fabrication‚ falsification‚ or plagiarism are strictly prohibited. Confidentiality and intellectual property rights must be respected. Ethical dilemmas should be addressed through open communication and consultation with supervisors or ethics committees. JLab promotes a culture of responsibility and accountability‚ ensuring that scientific advancements align with societal values and moral standards. By upholding ethical principles‚ researchers contribute to trustworthy and impactful outcomes.

Data Collection and Analysis in JLab
This section covers effective methods for collecting and analyzing data in JLab‚ ensuring accuracy and reproducibility. It emphasizes the use of appropriate tools and ethical data handling practices.
5.1. Data Collection Techniques
Data collection techniques are essential for gathering accurate and reliable information in JLab. Common methods include digital sensor readings‚ manual observations‚ and automated data logging. Researchers utilize tools like spreadsheets or specialized software to record data efficiently. Proper techniques ensure consistency‚ accuracy‚ and reproducibility‚ which are critical for meaningful analysis. Always follow established protocols to maintain data integrity and adapt methods based on experimental requirements.
5.2. Data Analysis Tools and Software
In JLab‚ various tools and software are used to analyze data accurately. Common tools include Excel for basic calculations‚ Python libraries like NumPy and Pandas for advanced computations‚ and MATLAB for complex numerical analysis. Graphical software such as Origin or Igor Pro is used for plotting and visualizing results; Specialized programs like R or SPSS are employed for statistical analysis. Additionally‚ JLab provides access to proprietary software tailored for specific experiments. Proper training and proficiency in these tools are essential for interpreting data effectively. Researchers are encouraged to select the most appropriate software based on the nature of their experiments and the type of data collected. Regular updates and technical support ensure that these tools remain efficient and reliable for all JLab users.
5.3. Interpreting Results
Interpreting results is a critical step in the JLab process‚ ensuring data is translated into meaningful conclusions. Researchers analyze trends‚ patterns‚ and anomalies to draw valid inferences. Statistical methods are applied to determine significance‚ while graphs and charts help visualize findings. It’s essential to compare results with initial hypotheses and assess whether they support or contradict expectations. Objectivity is key; interpretations should be based on evidence rather than assumptions. Common challenges include identifying confounding variables and addressing unexpected outcomes. If results are inconsistent‚ further investigation or experimental adjustments may be necessary. Proper documentation of interpretations ensures transparency and facilitates peer review. The goal is to extract actionable insights that contribute to scientific understanding or practical applications. By systematically interpreting data‚ JLab researchers can make informed decisions and advance their work effectively.

Reporting and Documentation in JLab
Reporting and documentation are essential for tracking experiments‚ ensuring reproducibility‚ and maintaining accountability. Accurate records of procedures‚ data analysis‚ and outcomes are vital for transparent and reliable research outcomes.
6.1. Writing Lab Reports
Writing lab reports is a critical step in documenting experimental processes and results. A well-structured report includes an introduction‚ materials‚ methods‚ results‚ and discussion. Clarity‚ accuracy‚ and objectivity are essential. Always follow JLab’s formatting guidelines to ensure consistency. Use clear headings and subheadings to organize content. Include raw data‚ calculations‚ and visual representations like graphs or charts. Avoid jargon and ensure the report is understandable to all stakeholders. Peer review and proofreading are recommended to identify errors. Adherence to ethical standards and proper citation of references are mandatory. The report should reflect the scientific rigor and reproducibility of the experiment. By maintaining detailed records‚ researchers contribute to the integrity and advancement of JLab’s scientific endeavors.
6.2. Documenting Experimental Procedures
Documenting experimental procedures is essential for reproducibility and accountability in JLab. Researchers must record every step in detail‚ including materials‚ equipment‚ and conditions. Use standardized templates to maintain consistency. Note any deviations from planned methods and unexpected observations. Include timestamps‚ personnel involved‚ and equipment calibration details. Digital documentation is preferred for easy access and version control. Ensure all records are stored securely‚ following JLab’s data management policies. Regularly review and update documentation to reflect changes in protocols or techniques. Proper documentation also aids in troubleshooting and ensures compliance with safety and ethical standards. By maintaining precise and thorough records‚ JLab upholds its commitment to scientific integrity and collaboration.
6.3. Sharing Results
Sharing results is a critical step in the JLab workflow‚ ensuring transparency and collaboration. Researchers should present findings through clear‚ concise reports‚ presentations‚ or publications. Use visual aids like graphs and tables to enhance understanding. Ensure all data is anonymized and comply with confidentiality agreements. Before sharing‚ obtain necessary permissions and follow JLab’s intellectual property guidelines. Collaborate with colleagues to review and validate results. Share preliminary findings internally through meetings or digital platforms‚ and publish final results in reputable journals or conferences. Properly cite all contributions and acknowledge team efforts. JLab encourages open communication to foster innovation and knowledge exchange while maintaining ethical standards and intellectual property protection.
Troubleshooting and Common Issues in JLab
This section addresses common challenges faced in JLab‚ offering practical solutions and optimization strategies. It covers identifying issues‚ troubleshooting techniques‚ and tips for improving experimental outcomes effectively.
7.1; Identifying Common Issues
In JLab‚ common issues often arise from equipment malfunctions‚ software glitches‚ or human error. These problems can disrupt experiments and affect results. Equipment-related issues may include faulty sensors‚ misaligned instruments‚ or incorrect calibration. Software-related problems might involve data processing errors or compatibility issues with newer systems. Human error can stem from improper use of tools or deviation from established protocols. Environmental factors‚ such as temperature fluctuations or humidity‚ can also impact sensitive experiments. Identifying these issues early is crucial to minimizing downtime and ensuring accurate results. Regular equipment checks‚ thorough documentation‚ and adherence to safety protocols can help pinpoint problems. Additionally‚ maintaining a log of recurring issues can aid in developing targeted solutions and improving overall lab efficiency. Early detection and resolution are key to maintaining a smooth and productive experimental environment.
7.2. Troubleshooting Techniques
Troubleshooting in JLab involves a systematic approach to identify and resolve issues efficiently. Start by gathering information about the problem‚ such as error messages or unusual behavior. Next‚ compare current conditions with expected norms to isolate the root cause. Consult equipment manuals‚ user guides‚ or software documentation for specific solutions. For complex issues‚ use diagnostic tools or run test experiments to narrow down potential causes. Collaborate with colleagues or seek expert advice when needed. Documenting each step of the troubleshooting process helps track progress and prevents recurring problems. Regular maintenance and updates can also prevent issues from arising. By following a structured method‚ JLab users can address challenges effectively and minimize downtime‚ ensuring experiments proceed smoothly and safely.
7.3. Optimizing Experimental Outcomes
Optimizing experimental outcomes in JLab requires careful planning and refinement of techniques. Begin by reviewing experimental design and adjusting parameters to improve accuracy and reliability. Regularly calibrate equipment to ensure precision and consistency in results. Utilize advanced data analysis tools to identify trends and refine methodologies. Collaborate with colleagues to share insights and adopt best practices. Documenting experimental conditions and outcomes thoroughly allows for better reproducibility and continuous improvement. Additionally‚ stay updated with the latest advancements in your field to incorporate innovative approaches. By systematically evaluating and enhancing each step of the experimental process‚ JLab users can achieve higher-quality results and advance their research objectives effectively.

Appendices
The appendices provide supplementary materials to support your effective work in JLab. They include a glossary of terms‚ references‚ further reading‚ and contact information for additional guidance.
8.1. Glossary of Terms
This section provides a comprehensive glossary of terms frequently used in the JLab manual. It defines key concepts‚ technical jargon‚ and specific terminology to ensure clarity and understanding. Common terms include calibration (the process of configuring equipment to ensure accuracy)‚ data analysis (the interpretation of experimental results)‚ and ethics (principles guiding responsible research practices). Additional entries cover lab safety‚ experimental design‚ and troubleshooting. Each definition is concise and context-specific‚ offering a quick reference for users seeking to understand complex topics. The glossary is designed to support both newcomers and experienced researchers‚ fostering a shared language and facilitating effective communication within the JLab environment. By familiarizing yourself with these terms‚ you can navigate the manual and its procedures with greater confidence and precision.
8.2. References and Further Reading
This section provides a list of essential references and recommended reading materials to support your understanding of JLab procedures and best practices. It includes academic papers‚ industry standards‚ and textbooks that delve into topics such as lab safety‚ experimental design‚ and data analysis. Key resources cover advanced techniques in calibration‚ troubleshooting‚ and ethical research practices. Additionally‚ this section directs you to online courses‚ tutorials‚ and workshops for hands-on learning. The references are categorized by topic‚ making it easy to find relevant materials. For instance‚ sections on data interpretation and equipment maintenance provide in-depth guidance. This resource is designed to help users expand their knowledge and stay updated on the latest developments in laboratory research and practices.
8.3. Contact Information and Support
For any questions or assistance regarding JLab procedures‚ please contact our support team at support@jlab.com or call +1 (800) 123-4567; We are available Monday-Friday‚ 8:00 AM to 5:00 PM EST. If you encounter technical issues‚ visit our FAQs section on the JLab website for troubleshooting guides. Additionally‚ you can submit a ticket through our online support portal for personalized assistance. Stay updated with the latest JLab news and resources by joining our newsletter or following us on LinkedIn and Twitter. For training inquiries‚ email training@jlab.com. Our team is committed to ensuring your experience with JLab is productive and successful. Please do not hesitate to reach out for any further support or clarification.