Category Archives: Guide

ring size guide cm

Understanding your ring size is essential for both comfort and style. This guide helps you navigate measuring methods, size charts, and factors affecting your perfect fit.

Importance of Knowing Your Ring Size

Knowing your ring size ensures a perfect fit, blending comfort and style seamlessly. A well-fitting ring avoids discomfort and the hassle of resizing or returns. Proper sizing ensures the ring stays securely in place without being overly tight, enhancing both aesthetics and functionality. Additionally, understanding your size helps when shopping online, where physical try-ons aren’t possible. It also allows for accurate comparisons across different sizing systems, such as US, European, or Asian standards. Measuring correctly accounts for factors like temperature fluctuations and knuckle size, ensuring the ring glides on easily and sits comfortably throughout the day. Accurate sizing is key to enjoying your jewelry to the fullest.

How Ring Sizes Are Measured

Ring sizes are measured based on the inner circumference or diameter of the band. The most common method involves determining the circumference in millimeters, which is then converted into standard size numbers or letters. For instance, a 50mm circumference corresponds to a specific size in different regions. Some jewelers use mandrels or ring gauges to measure existing rings, ensuring precision. Alternatively, a string or ruler can be used at home by wrapping it around the finger and measuring the length in centimeters or inches, which is then matched to a size chart. This ensures accuracy whether measuring at home or professionally, providing a reliable guide for the perfect fit.

Understanding Ring Size Charts

Ring size charts are standardized tools that help determine the correct fit based on measurements. They typically list sizes in numbers or letters, corresponding to specific circumferences in centimeters or inches. These charts vary by region, with the US, UK, Europe, and Asia each having their own systems. For example, a size 6 in the US is equivalent to an M in the UK and approximately 16.5mm in diameter. Understanding these charts is crucial for comparing sizes across regions and ensuring accuracy. They often include both circumference and diameter measurements, allowing consumers to match their finger measurements to the correct size. This guide is essential for jewelers and individuals alike to find the perfect fit.

How to Measure Your Ring Size at Home

Measuring your ring size at home is simple and accurate. Use a ring sizer tool, string, or ruler to find your size in centimeters or inches effectively.

Using a Ring Sizer Tool

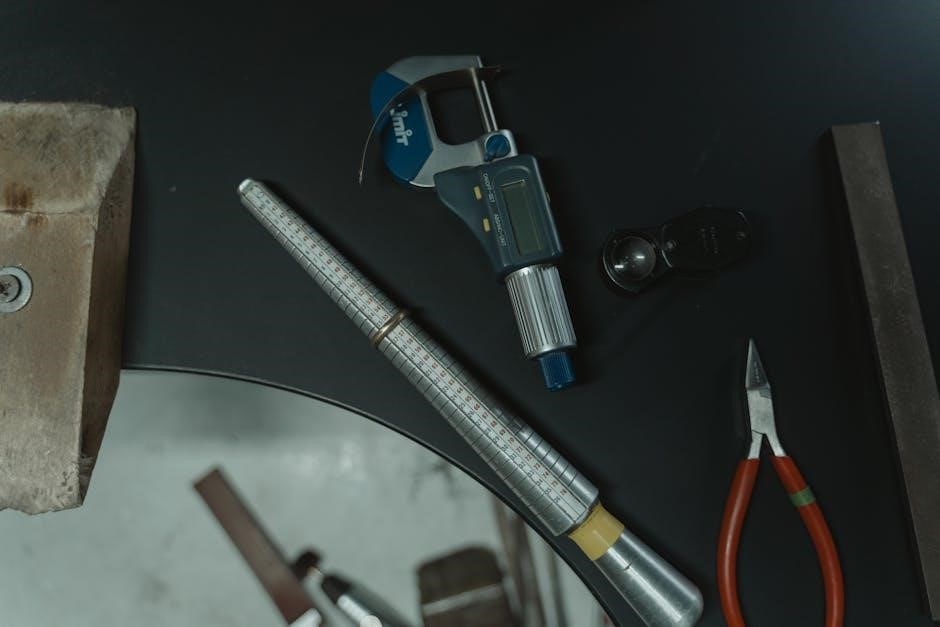
A ring sizer tool is the most accurate method to determine your ring size. Simply place the tool over your finger, ensuring a comfortable fit without tightness or looseness. The tool measures the inside circumference of the band, providing a precise size in centimeters. This method is highly recommended for those unfamiliar with their size, as it eliminates guesswork and ensures a perfect fit. Always use a high-quality tool for the most accurate results, and refer to the included size chart to convert measurements to your desired regional standard, such as US, European, or UK sizes.

Measuring with a String or Ruler

To measure your ring size at home using a string or ruler, wrap a flexible string or a soft measuring tape around the base of your finger. Mark the point where the string overlaps, then lay it flat and measure the length in centimeters using a ruler. This measurement corresponds to the inside circumference of the ring. For accuracy, ensure the string fits comfortably without being too tight or loose. Compare your measurement to a standard ring size chart to determine your size in centimeters. This method is simple and effective, providing a reliable way to find your ring size without specialized tools. Always measure at room temperature for the best results.

Determining Size Based on Existing Rings

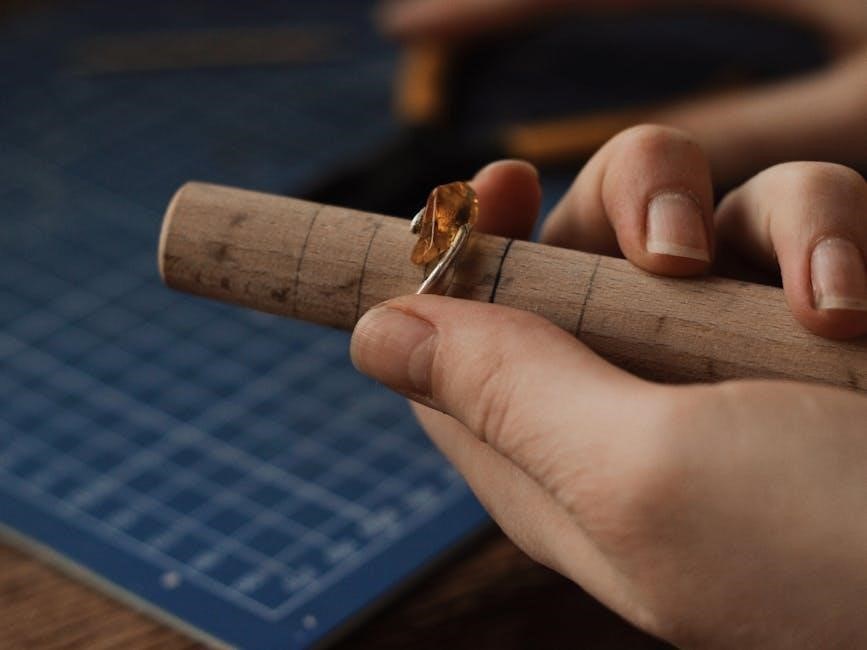
If you already own a well-fitting ring, you can use it to determine your size. Place the ring on a ruler or measuring tool and measure the inside diameter in centimeters. This diameter corresponds to your ring size. For accuracy, ensure the ring lies flat and the measurement is taken from one inner edge to the other. Compare this measurement to a standard ring size chart to find your size. This method is convenient and reliable, especially if you have a ring that fits comfortably. Always consider the thickness and design of the existing ring, as these can affect the fit. This approach avoids the need for new measurements and leverages what you already know fits well. It’s a practical solution for determining your ring size accurately.

Standard Ring Size Charts

Standard ring size charts vary by region, with measurements in CM. They provide a consistent reference for determining your ring size accurately across different countries and jewelers.

US Ring Size Chart in CM

The US ring size chart in centimeters is a standardized guide to help determine the perfect fit. It measures the inside diameter of the ring, which corresponds to specific sizes. For example, a size 4 ring has a diameter of 14.5mm, size 5 is 15.3mm, and size 6 is 16.1mm. This chart is widely used by jewelers to ensure accuracy. When purchasing a ring, it’s essential to consult this chart to match your finger measurements. It’s also helpful to get your size measured professionally, as sizes can vary slightly between manufacturers. Using this guide ensures comfort and proper fit, making it a reliable tool for choosing the right ring.

European Ring Size Chart in CM

The European ring size chart in centimeters provides a clear reference for determining ring sizes. It is based on the internal circumference of the ring, measured in millimeters. Sizes range from 40 to 70, with each size increasing by approximately 1.3mm. For instance, a size 48 ring has a circumference of 48mm, while a size 50 measures 50mm. This system is widely used across Europe and offers a precise method for jewelers and consumers alike. By measuring the finger’s circumference or using an existing ring, individuals can find their European size easily. This chart ensures an accurate and comfortable fit, making it a trusted resource for ring sizing.

UK Ring Size Chart in CM

The UK ring size chart in centimeters uses a letter-based system, ranging from A to Z. Each size corresponds to a specific measurement, increasing by approximately 1.1mm per size. For example, size H measures 46.8mm, while size L measures 51.9mm. This system is widely used in the UK and Ireland, offering a straightforward way to determine ring sizes. To find your size, measure the internal circumference of your finger or an existing ring. Converting sizes to US or European standards is also possible for international purchases. Accurate measurement ensures a comfortable fit, making this chart a reliable tool for selecting the perfect ring size.

Asian Ring Size Chart in CM

The Asian ring size chart in centimeters uses a numerical scale, typically ranging from 5 to 25. Each size represents the internal diameter of the ring in millimeters. For example, size 5 measures 15.7mm, while size 25 measures 50.3mm. This system is popular in countries like China, Japan, and South Korea. To determine your size, measure the inside of a well-fitting ring or use a string around your finger. The chart is designed to ensure a precise fit, accommodating the smaller average sizes common in Asian markets. Converting these sizes to US or European standards is also straightforward for international jewelry purchases, ensuring comfort and style.

Ring Size Conversion Guide

Convert ring sizes effortlessly between US, UK, European, and Asian standards using precise measurements in centimeters. This guide ensures accurate sizing for international jewelry purchases.

Converting US to European Sizes

Converting US to European ring sizes involves understanding the differences in their numerical systems. US sizes are based on the inside diameter of the ring, while European sizes use a continuous numbering system. To convert, subtract 2 from the US size to get the European equivalent. For example, a US size 6 is a European size 4. This ensures accurate sizing when purchasing jewelry internationally. Always refer to a size chart for precise conversions, as small discrepancies can affect comfort and fit. Accurate sizing is crucial for both style and comfort, making this conversion guide an essential tool for shoppers.

Converting UK to US Sizes

Converting UK to US ring sizes requires understanding their respective systems. UK sizes are typically letter-based, while US sizes are numerical. To convert, subtract 0.25 from the UK size to get the US equivalent. For example, a UK size L (5.75) corresponds to a US size 5.5. This slight difference ensures accurate sizing when purchasing jewelry across regions. Always use a size chart for precise conversions to avoid discomfort or poor fit. Proper sizing enhances both comfort and style, making this guide indispensable for international shoppers.

Converting Inches to CM for Ring Size

Converting inches to centimeters for ring size is straightforward. Since 1 inch equals 2.54 cm, multiply the inner diameter in inches by 2.54 to get the measurement in centimeters. For example, if a ring measures 0.7 inches inside, it converts to 1.778 cm. This conversion is essential for matching international size standards. When measuring with a ruler, ensure accuracy to avoid sizing errors. Always round to the nearest whole number for sizing charts. This method ensures a precise fit, whether purchasing domestically or internationally. Proper conversion enhances comfort and style, making it a vital step in choosing the right ring size.

Factors Affecting Ring Size

Ring size is influenced by temperature, knuckle size, and ring thickness. These elements impact comfort and fit, ensuring the ring sits perfectly without causing discomfort or restriction.

Temperature and Ring Fit

Temperature plays a crucial role in ring fit, as metal expands in heat and contracts in cold. This can cause a ring to feel looser in warmer conditions and tighter in cooler environments. For example, a ring measured in the morning may feel snug, while the same ring might feel restrictive by evening due to natural swelling of the finger. It’s important to consider temperature fluctuations when determining your size, as they can significantly affect comfort. Measuring at room temperature or avoiding extreme conditions ensures a more accurate fit. This natural expansion and contraction highlight the need for a balance between a comfortable and secure fit, regardless of environmental changes.

Ring Thickness and Comfort

Ring thickness significantly impacts comfort and fit. Thicker rings provide durability but can feel restrictive, especially on smaller fingers. Thinner rings offer a more delicate appearance and are often preferred for everyday wear. The thickness, measured in millimeters, affects how the ring sits on the finger. For instance, a 2mm band may feel comfortable for someone with slender fingers, while a 4mm band might be more suitable for larger hands. Balancing style and comfort is key, as a ring that’s too thick can cause discomfort, while one that’s too thin may bend easily. Choosing the right thickness ensures both aesthetics and practicality, enhancing overall satisfaction with the ring. Proper sizing accounts for this factor to guarantee a pleasant wearing experience.

Knuuckle Size and Ring Fit

Knuuckle size plays a crucial role in determining the perfect ring fit. A larger knuckle may require a slightly larger ring size to ensure comfort and easy removal. To measure knuckle size, wrap a string or ruler around the widest part of the knuckle and compare it to standard size charts. This ensures the ring slides on and off smoothly without being too tight or too loose. If the knuckle is significantly larger than the finger, it may be necessary to size up for comfort. Properly accounting for knuckle size ensures the ring remains secure yet comfortable, avoiding any potential discomfort or difficulty in removal. This factor is especially important for thicker rings, which may feel more restrictive if not sized correctly. Always consider knuckle size when choosing your ring to achieve the ideal balance between style and comfort.

Domed vs. Flat Rings

Domed and flat rings differ in design, which can impact fit and comfort. Domed rings feature a rounded, curved top, while flat rings have a sleek, low-profile design. The choice between the two often comes down to personal style, but it also affects how the ring sits on the finger. Domed rings may feel more spacious due to their shape, while flat rings provide a snug fit. When sizing, consider the thickness and height of the band, as these factors influence comfort and sizing accuracy. For example, a thicker domed ring might require a slightly larger size for comfort, whereas a flat ring may fit true to size. Ultimately, the ring’s design should align with your lifestyle and preferences to ensure the best fit;

How to Choose the Perfect Ring Size

Selecting the right ring size ensures comfort and style. Consider factors like finger shape, knuckle size, and ring thickness to find your ideal fit easily.

Signs of a Well-Fitting Ring

A well-fitting ring sits comfortably on your finger without slipping off or feeling too tight. It should rotate freely but not spin excessively. The ring should not pinch or restrict movement, allowing a slight gap between the band and your skin for comfort. Proper fit ensures the ring stays in place while performing daily activities. If the ring feels balanced and neither too loose nor too tight, it indicates an accurate size. Pay attention to these signs to ensure your ring is both stylish and comfortable for long-term wear.

When the Ring is Too Tight or Too Loose

If a ring feels too tight, it may cause discomfort or restrict blood flow, especially in warmer conditions. A ring that is too loose might slip off easily, increasing the risk of loss. Proper fit is crucial for both comfort and security. A tight ring should be avoided as it can lead to swelling or skin irritation, while a loose ring may catch on objects, causing damage. Ensuring the right balance prevents these issues, providing a comfortable and secure wear. Paying attention to how the ring feels and fits is essential for long-term satisfaction and safety.

Tips for Sizing Different Finger Shapes

Finger shapes vary, and sizing should be adjusted accordingly. For slender fingers, a slightly smaller size may be appropriate, while thicker fingers often require a larger size. Knuckle size is crucial—measure the widest part to ensure the ring can slide over comfortably. If fingers taper significantly, consider a ring with an adjustable band for a secure fit. For those with wider knuckles, opting for a ring with a comfort fit or curved design can enhance wearability. Consulting a professional jeweler is recommended for unique finger shapes to ensure the perfect fit and comfort.

Common Mistakes in Measuring Ring Size

Measuring at the wrong time, using incorrect tools, and not considering ring design are frequent errors. These mistakes can lead to an ill-fitting ring.

Measuring at the Wrong Time of Day

Measuring your ring size at the wrong time can lead to inaccurate results. For instance, your finger size may vary throughout the day due to factors like temperature and activity. In the morning, your fingers tend to be smaller due to lower blood flow, while they may swell slightly in the afternoon or evening. It’s recommended to measure your ring size at room temperature, avoiding times when your hands are cold or overly warm. Additionally, measuring after exercise or when your hands are swollen can also result in an incorrect size. Consistency is key for an accurate fit.

Not Considering the Ring’s Design

Ignoring the ring’s design when measuring can lead to a poor fit. For example, thicker bands may require a larger size for comfort, while narrower rings can fit more snugly. Additionally, rings with intricate details or settings may affect how they sit on the finger. The style of the ring, such as domed or flat, can also influence the fit; It’s crucial to consider these factors when choosing a size, as they can impact both comfort and appearance. Always ensure the size aligns with the specific design to avoid a ring that feels too tight or too loose. Proper fit ensures optimal comfort and style.

Using Incorrect Tools for Measurement

Using the wrong tools for measuring your ring size can lead to inaccurate results. For instance, using a standard ruler or household items without proper calibration may result in imprecise measurements. This can cause the ring to be either too tight or too loose, leading to discomfort or the need for resizing. It’s essential to use tools specifically designed for ring sizing, such as a ring sizer or a string method, to ensure accuracy. Incorrect tools often fail to account for the finger’s shape and knuckle size, which are critical factors in determining the right fit. Always opt for reliable methods to avoid sizing errors and ensure your ring feels comfortable and secure. Proper measurement tools are key to achieving the perfect fit.

How to Resize a Ring

Resizing a ring involves professional techniques to adjust the band’s fit. Jewelers use methods like stretching, soldering, or cutting to modify the size while preserving the ring’s integrity.

Professional Ring Resizing Options

Professional jewelers offer expert ring resizing services to ensure a precise fit. Techniques include soldering, stretching, or cutting the band, often involving resetting stones for stability. They use specialized tools to maintain the ring’s structural integrity while adjusting its size. This method is recommended for intricate designs or valuable pieces. Resizing typically takes a few days, depending on the complexity. Consulting a professional ensures the ring retains its value and aesthetic appeal. They also provide guidance on the best resizing method based on the ring’s material and design. This ensures a comfortable and durable fit without compromising the ring’s quality or appearance.

Adjusting Rings at Home Safely

Adjusting rings at home requires care to avoid damaging the piece. Simple tools like pliers or ring sizing kits can be used for minor adjustments. For prong-set stones, gently tighten or loosen the prongs. For bands, heating the metal slightly can make it more pliable. However, this method is risky and may weaken the metal. It’s crucial to follow detailed instructions or video guides. Avoid using harsh chemicals or excessive force. For intricate or valuable rings, professional resizing is recommended. Always prioritize caution to preserve the ring’s integrity and ensure a secure fit without causing irreversible damage.

Choosing the right ring size ensures comfort and style. Use this guide to measure accurately, consider factors like temperature, and opt for professional resizing if needed. Perfect fit guaranteed.

Final Tips for Choosing the Right Ring Size

To ensure the perfect fit, measure your ring size when your finger is at room temperature, as size can vary throughout the day. Consider the ring’s design and thickness, as wider bands may require a larger size. Use a ring size chart specific to your region, as sizing systems differ between countries. If unsure, consult a professional jeweler for accurate measurement. Remember, a well-fitting ring should be comfortable yet secure, neither too tight nor too loose. By following these guidelines, you can confidently select the ideal ring size for lasting comfort and style.

Importance of Proper Fit for Comfort and Style

A properly fitting ring ensures both comfort and style, preventing discomfort from tightness or frequent adjustments due to looseness. A well-fitting ring enhances the overall aesthetic appeal, making it a seamless part of your look. Proper fit is crucial for maintaining the longevity of the ring, as ill-fitting jewelry can lead to damage or loss. It’s important to consider factors like finger shape, knuckle size, and temperature fluctuations when determining your size. By prioritizing a precise fit, you ensure your ring remains a comfortable and stylish accessory, providing years of enjoyment and satisfaction.

crib shoes size guide

Crib shoes are essential for babies‚ providing protection and support during early development․ They come in various styles‚ from soft soles to dress shoes‚ ensuring comfort and versatility․ Choosing the right size and fit is crucial for healthy foot growth‚ as poorly fitting shoes can cause discomfort or developmental issues․ Parents often face challenges in selecting the perfect pair‚ making a size guide indispensable for ensuring the best fit․ Crib shoes are not just functional but also adorable‚ making them a must-have for every baby’s wardrobe․

1․1 What Are Crib Shoes?

Crib shoes are soft‚ lightweight footwear designed specifically for infants and young babies․ They are typically made from soft materials like leather‚ fabric‚ or suede‚ ensuring comfort and flexibility for tiny feet․ Unlike hard-soled shoes‚ crib shoes are designed for pre-walkers or early walkers‚ providing gentle protection without restricting foot movement․ They are often used for special occasions or as a stylish addition to baby outfits․ Crib shoes are not meant for outdoor activities but rather for indoor use or formal events․ Their primary purpose is to keep baby’s feet warm and comfortable while allowing natural foot development․ They are usually available in various sizes‚ from newborn to toddler sizes‚ and come in a wide range of styles and designs to suit different preferences and needs․

1․2 Importance of Proper Fit for Baby’s Feet

A proper fit is crucial for baby’s foot health and comfort․ Ill-fitting crib shoes can cause discomfort‚ blisters‚ or even hinder natural foot development․ Tight shoes may restrict toe movement‚ potentially leading to issues like hammertoes or ingrown toenails․ Conversely‚ shoes that are too loose can cause slipping‚ which may lead to tripping or instability while walking․ Properly fitted crib shoes allow toes to wiggle freely‚ promoting healthy growth and muscle strength․ They also help maintain balance and coordination as babies learn to walk․ Ensuring the right fit is essential for preventing long-term foot problems and ensuring your baby’s feet develop naturally․ Parents should prioritize comfort and support when selecting crib shoes‚ as these early years lay the foundation for lifelong foot health․

Understanding Crib Shoe Sizes

Crib shoe sizes are categorized by age‚ ensuring a snug fit․ Understanding these sizes helps parents choose appropriately‚ considering growth and brand variations for comfort․

2․1 Standard Crib Shoe Size Charts

Standard crib shoe size charts are designed to guide parents in selecting the right fit for their baby․ These charts typically correlate a baby’s age range with specific shoe sizes‚ ensuring comfort and proper support․ Sizes are usually categorized by months‚ reflecting average foot growth stages․ For instance‚ a 0-3 months size is smaller than a 12-18 months size‚ accommodating natural growth․ Most brands adhere to these charts‚ though slight variations may occur․ Parents can use these charts as a starting point‚ but it’s important to consider individual foot shapes and growth rates․ The charts often include measurements in inches or centimeters‚ providing a clear reference for fitting․ They are widely available online and in stores‚ making it easier for parents to navigate the world of baby footwear confidently․

2․2 How to Read Size Charts

Reading crib shoe size charts is essential for ensuring the best fit for your baby․ These charts typically organize sizes by age ranges‚ such as 0-3 months or 6-9 months‚ and often include foot length in inches or centimeters․ Start by locating your baby’s age range‚ then cross-reference it with their foot measurement․ Pay attention to whether the chart lists “insole length” or “outsole length‚” as this can affect fit․ If your baby’s foot falls between sizes‚ it’s best to round up to ensure comfort․ Some charts may also specify width options‚ such as narrow‚ medium‚ or wide․ Always check for additional features like extra room for growth or adjustable straps․ Remember‚ sizing can vary slightly between brands‚ so refer to each brand’s specific chart for accuracy․ Online resources often provide detailed guides to help you interpret size charts effectively․

2․3 Size Conversion Between Different Brands

Size conversion between different brands can be tricky due to variations in sizing standards․ While one brand may label a shoe as size 6‚ another may have a slightly different measurement for the same size․ Parents should refer to each brand’s specific size chart to ensure accuracy․ Many brands provide detailed conversion guides or fit charts on their websites‚ which can help compare sizes across different labels․ Additionally‚ some brands offer universal size converters that align their sizing with industry standards․ When shopping across brands‚ it’s essential to measure your baby’s foot and cross-reference it with the brand’s chart to find the best fit․ This approach helps avoid sizing discrepancies and ensures comfort for your baby․

How to Measure Your Baby’s Foot

To measure your baby’s foot‚ place it flat on paper‚ mark the longest and widest points‚ and use a size chart for accuracy․ Measure when the foot is most relaxed for the best fit․

3․1 The Best Method for Measuring

Measure your baby’s foot by tracing the outline on paper‚ ensuring the foot is flat and the baby is still․ Use a ruler to mark the longest and widest points․ Always measure both feet‚ as they may differ slightly‚ and use the larger size for comfort․ For accuracy‚ measure when the foot is relaxed‚ not swollen or curled․ This method ensures a precise fit‚ preventing tightness or excessive room․ Proper measurement is key to avoiding discomfort and potential foot issues․ By following this approach‚ you can confidently select the right crib shoe size for your baby’s healthy growth and comfort․

3․2 Using a Size Chart for Accuracy

Using a size chart is crucial for ensuring accuracy when selecting crib shoes․ While foot measurements provide a baseline‚ size charts help align these measurements with specific brands’ sizing standards․ Most charts include age ranges and corresponding foot lengths‚ offering a guide for parents․ However‚ sizes can vary between brands‚ so it’s important to refer to the chart provided by the manufacturer․ By cross-referencing your baby’s foot measurements with the chart‚ you can determine the best fit․ Remember‚ size charts are tools to aid in selection‚ but understanding your baby’s unique foot shape and growth patterns is equally vital․ Always double-check the chart before making a purchase to ensure comfort and proper fit for your baby’s feet․

3․3 When to Measure for the Best Fit

Measuring your baby’s foot at the right time is essential for achieving the best fit․ Feet tend to swell slightly throughout the day‚ so measuring in the late afternoon or early evening ensures accuracy․ Additionally‚ growth spurts‚ particularly around 6-8 months‚ require frequent checks․ Consistency is key; always measure both feet‚ as they may differ slightly․ Use a ruler or printable size chart to record the length and width․ Regular measurements every 1-2 months help track growth and prevent shoes from becoming too tight․ By timing your measurements correctly‚ you can ensure your baby’s crib shoes provide comfort and support during their developmental stages․ This practice also helps in selecting the right size as your baby grows‚ avoiding the risk of ill-fitting shoes․

Choosing the Right Fit

Ensuring the right fit is crucial for your baby’s comfort and foot health․ Look for shoes with soft‚ breathable materials and adequate room for toe movement․ Always try shoes on your baby and check for a snug yet comfortable fit․ Avoid overly tight or loose shoes‚ as they can cause discomfort or restrict natural foot development․ Properly fitted crib shoes support healthy growth and allow your baby to move freely‚ making them essential for both everyday wear and special occasions․

4․1 Key Factors to Consider

When selecting crib shoes‚ several key factors should guide your decision․ First‚ consider your baby’s foot shape and size‚ ensuring the shoe accommodates natural growth․ Next‚ prioritize materials that are soft‚ breathable‚ and non-irritating․ Proper fit is essential—check for adequate toe room and a snug heel to prevent slipping․ The shoe’s opening should be easy to access for hassle-free dressing․ Ankle support is another crucial feature‚ providing stability without restricting movement․ Additionally‚ the sole’s flexibility and traction are important for early walkers․ Lastly‚ consider the shoe’s adjustability‚ such as laces or Velcro‚ to ensure a secure fit as your baby grows․ By focusing on these elements‚ you can find a pair that balances comfort‚ support‚ and style for your little one․

4․2 Signs of a Good Fit

A good fit in crib shoes is evident when the shoe provides adequate room for the baby’s toes to wiggle freely‚ typically allowing about half an inch of space between the end of the shoe and the longest toe․ The heel should fit snugly but not feel restrictive‚ ensuring the shoe stays in place without slipping off․ Soft‚ breathable materials are essential for comfort‚ and the shoe should not cause red marks or indentations on the foot․ Additionally‚ the baby should show no signs of discomfort‚ such as fussing or trying to remove the shoes․ Proper fit ensures healthy foot development and prevents issues like blisters or poor posture․ Always check for these signs to confirm the shoes are comfortable and supportive for your baby’s growing feet․

4․3 How to Check for Proper Fit

To ensure your baby’s crib shoes fit properly‚ start by having your baby stand on a flat surface․ Gently press your thumb into the shoe at the heel and toe to check for adequate space—about half an inch at the toe and a snug fit at the heel․ Avoid shoes that cause the foot to spill over the edges or dig into the skin․ Use a shoe-sizing chart to verify the length and width‚ ensuring the fit aligns with the chart’s guidelines․ Additionally‚ check for any pressure points or tight spots by gently feeling around the shoe while it’s on the foot․ If possible‚ visit a professional shoe fitter for an accurate assessment․ Regularly reassess the fit as your baby grows‚ replacing shoes when they become too tight or worn․ Proper fit ensures comfort and supports healthy foot development․

Materials and Comfort

Crib shoes are crafted from soft‚ breathable materials like leather‚ fabric‚ or mesh‚ ensuring comfort and flexibility․ Breathable fabrics keep feet cool‚ preventing irritation and promoting healthy growth․

5․1 Different Materials Used

Crib shoes are made from a variety of materials‚ each offering unique benefits․ Leather is durable and breathable‚ while fabric and mesh provide lightweight comfort․ Soft suede and nubuck are gentle on delicate skin‚ reducing irritation․ Eco-friendly options like organic cotton or recycled materials are also popular for their sustainability․ Synthetic materials are often waterproof‚ making them ideal for outdoor use․ The choice of material depends on the season‚ activity‚ and personal preference‚ ensuring babies stay comfortable and protected․ Breathable fabrics are especially important for warm weather‚ while thicker materials like velvet or fleece are perfect for colder months․ Parents can choose based on their baby’s needs‚ ensuring optimal comfort and support for tiny feet․

5․2 Importance of Breathability

Breathability is crucial for crib shoes‚ as babies’ feet sweat naturally‚ and moisture buildup can lead to discomfort and irritation․ Shoes made from breathable materials‚ such as mesh or organic cotton‚ allow air to circulate‚ keeping feet cool and dry․ This helps prevent fungal infections and odors‚ ensuring a healthy environment for tiny feet․ Proper ventilation also reduces the risk of blisters and rashes‚ promoting comfort during crawling or walking․ Additionally‚ breathable materials are lightweight‚ making them ideal for delicate skin․ Parents should prioritize breathable options‚ especially for warm weather or active babies‚ to maintain hygiene and comfort․ A well-ventilated shoe not only enhances your baby’s comfort but also supports healthy foot development‚ making it a key factor in choosing the right crib shoes․

Seasonal Considerations

Seasonal factors play a role in choosing crib shoes․ Opt for lightweight‚ breathable designs in summer and insulated‚ warm options in winter to ensure comfort and protection year-round․

6․1 Shoes for Different Seasons

Choosing crib shoes based on the season ensures comfort and practicality․ In summer‚ opt for lightweight‚ breathable materials like canvas or mesh to keep little feet cool․ Sandals or open-toe designs are also great for warmer weather․ During winter‚ prioritize insulated shoes with warm linings to protect against cold temperatures․ Look for materials like suede or leather that offer durability and weather resistance․ Spring and autumn call for versatile options‚ such as soft leather or fabric shoes that can handle mild weather conditions․ Additionally‚ consider seasonal activities‚ like waterproof boots for rainy days or sturdy sneakers for outdoor adventures․ By selecting season-specific crib shoes‚ parents can ensure their baby’s feet remain comfortable and protected throughout the year․

6․2 Special Occasion Crib Shoes

Special occasion crib shoes are designed to complement your baby’s outfits for events like weddings‚ holidays‚ or formal gatherings․ These shoes often feature elegant designs‚ such as satin‚ velvet‚ or decorative buckles‚ making them perfect for dressing up․ Lightweight materials ensure comfort while adding a touch of sophistication․ For boys‚ loafers or dress shoes in neutral tones are popular‚ while girls’ styles might include Mary Janes or ankle straps with bows․ When choosing special occasion crib shoes‚ consider the event’s formality and your baby’s outfit to ensure a cohesive look․ Always prioritize comfort and proper fit‚ even for dressy occasions‚ to keep your baby happy and comfortable throughout the celebration․

Common Mistakes to Avoid

Common mistakes when choosing crib shoes include relying solely on brand sizes and ignoring the foot’s shape‚ which can lead to poor fit and discomfort․ Avoid these errors for the best results․

7․1 Relying Solely on Brand Sizes

Relying only on brand sizes is a common mistake when selecting crib shoes․ Each brand may have slightly different sizing standards‚ and what fits in one brand may not fit the same in another․ Parents often assume that if their child wears a specific size in one brand‚ it will apply universally‚ but this can lead to poorly fitting shoes․ To avoid this‚ always measure your baby’s foot and refer to the specific size chart provided by the brand․ Additionally‚ consider the shoe’s material and style‚ as these can affect fit․ Using a universal size chart or comparing sizes across brands can help ensure accuracy․ Remember‚ proper fit is more important than the size label‚ so don’t hesitate to try different sizes if needed․

7․2 Ignoring the Shape of the Foot

Ignoring the shape of your baby’s foot when choosing crib shoes is another common mistake․ Feet come in various shapes‚ such as narrow‚ wide‚ or flat‚ and not all shoes are designed to accommodate these differences․ Some crib shoes may cater to specific foot shapes‚ while others offer a one-size-fits-all approach․ Failing to consider the foot’s shape can lead to shoes that are either too tight or too loose‚ causing discomfort or restricting movement․ To avoid this‚ examine the shoe’s design and how it aligns with your baby’s foot shape․ If possible‚ try on multiple styles to find the best match․ Remember‚ a proper fit ensures comfort and supports healthy foot development‚ making it essential to prioritize both size and shape when selecting crib shoes․

Tips for Parents

Trace your baby’s foot outline and use it for sizing․ Buy multiple sizes ahead for growth․ Prioritize breathable‚ soft materials for comfort and hygiene․ Always check fit regularly to ensure proper support and avoid tightness‚ as this can hinder healthy foot development․ Regularly inspect shoes for wear and tear‚ replacing them as needed․ Consider seasonal variations for appropriate footwear․ Ensure shoes are lightweight to promote natural movement․ Lastly‚ involve your child in the selection process to encourage their preference‚ making the experience enjoyable for both of you․ This approach ensures your baby’s feet remain comfortable and well-supported throughout their early years․

8․1 When to Buy Crib Shoes

Buy crib shoes once your baby begins to crawl or show interest in walking‚ typically around 6-12 months․ Opt for soft‚ flexible styles to support early steps․ Avoid hard soles initially‚ as they can hinder natural movement․ Consider buying multiple sizes at once‚ as babies grow quickly․ Monitor foot growth and replace shoes when toes reach the edge or seams press into skin․ Seasonal variations may require different footwear‚ so plan accordingly․ Always prioritize proper fit to prevent blisters or discomfort․ Regularly check and update sizes to ensure optimal support and comfort․ This approach ensures your baby’s feet remain healthy and well-supported during early development․

8․2 How to Care for Crib Shoes

Proper care for crib shoes ensures durability and hygiene․ Gently clean dirt or stains with a soft cloth and mild detergent‚ avoiding harsh chemicals․ Allow shoes to air dry naturally to prevent shrinking or damage․ For leather crib shoes‚ use a soft brush or damp cloth to maintain their finish․ Store shoes in a cool‚ dry place‚ away from direct sunlight‚ to prevent fading or warping․ Regularly check for wear and tear‚ replacing them if they show significant signs of damage․ Avoid machine washing or soaking‚ as this can harm materials․ By following these care tips‚ you can extend the life of your baby’s crib shoes and keep them looking their best․

Properly fitting crib shoes are vital for a baby’s comfort and foot development․ Using a size guide ensures the best fit‚ promoting healthy growth and happy steps․

9․1 The Importance of Proper Fit

A proper fit in crib shoes is crucial for a baby’s foot health and comfort․ Ill-fitting shoes can lead to discomfort‚ blisters‚ or even long-term foot issues․ Ensuring the right size allows toes to move freely‚ promoting healthy growth․ A good fit also prevents tripping and slipping‚ enhancing stability as the baby begins to walk․ Parents should prioritize proper fit to support their child’s developmental milestones and overall well-being․ Regularly checking and updating shoe sizes as the baby grows ensures consistent comfort and support․ Investing time in finding the perfect fit pays off in the form of happy‚ healthy feet․

birds of michigan field guide

Michigan’s unique geography, surrounded by the Great Lakes, creates a diverse habitat for birds. Its location makes it a crossroads for migratory birds, offering a rich birdwatching experience.

1.1. Overview of Michigan’s Biodiversity

Michigan’s biodiversity is remarkable, with its diverse landscapes supporting a wide variety of bird species. The state’s strategic location between the Great Lakes and its mix of forests, wetlands, and grasslands create habitats for over 400 bird species. This biodiversity is enhanced by its position along major migratory routes, making it a critical stopover for birds traveling between breeding and wintering grounds. The Upper and Lower Peninsulas differ in ecosystems, further enriching the state’s avifauna. From waterfowl to songbirds, Michigan’s habitats sustain both resident and migratory species, showcasing a vibrant ecological balance that attracts birders and nature enthusiasts alike. Conservation efforts are vital to protecting this rich biodiversity for future generations.

1.2. Importance of Birdwatching in Michigan

Birdwatching holds significant ecological, economic, and educational value in Michigan. It fosters a deeper connection with nature, promoting conservation efforts and environmental stewardship. The hobby supports local economies through tourism, creating jobs in eco-tourism and related industries. Birdwatching also serves as an educational tool, inspiring scientific curiosity and awareness about Michigan’s diverse avifauna. Additionally, it plays a crucial role in monitoring bird populations, aiding in conservation initiatives. For many, it is a source of recreation and mental well-being, encouraging outdoor exploration. By engaging residents and visitors alike, birdwatching contributes to the preservation of Michigan’s natural heritage for future generations.

Key Characteristics of Michigan’s Birds

Michigan’s birds showcase remarkable diversity, with varying plumage, songs, and behaviors. Their adaptability to different habitats highlights their unique ecological roles and survival strategies.

2.1. Physical Traits and Plumage

Mirror the diversity of Michigan’s birdlife through their physical traits and plumage. Birds vary greatly in size and shape, from the tiny hummingbird to the majestic eagle. Plumage patterns, colors, and textures serve as key identifiers, often reflecting seasonal changes. Many species exhibit vibrant hues during breeding seasons, while others display more subdued tones for camouflage. Beak shapes and sizes also vary, adapted to specific diets, such as the broad, flat bill of a duck or the sharp, hooked beak of a raptor. These physical characteristics not only aid in identification but also reveal adaptations to their environment and ecological roles, making them fascinating subjects for study and observation.

2.2. Behavioral Patterns and Migration

Birds in Michigan exhibit varied behavioral patterns, influenced by seasons and habitats. Many species migrate, following established flyways like the Mississippi and Atlantic routes. Spring migration brings bursts of activity as birds return to breeding grounds, while fall migration sees flocks traveling south. Some birds, like waterfowl, rely on wetlands for resting and feeding during these journeys. Behavioral adaptations, such as flocking and nocturnal travel, enhance survival during migration. Resident birds, like chickadees, adapt to winter by altering diets and social behaviors. Understanding these patterns aids in predicting sightings and appreciating the dynamic nature of Michigan’s avifauna.

2.3. Habitat Preferences

Michigan’s birds occupy a wide range of habitats, from dense forests to open grasslands and wetlands. Forest-dwelling species like woodpeckers and warblers thrive in the state’s abundant woodlands. Wetlands attract herons, egrets, and waterfowl, while grasslands are home to sparrows and meadowlarks. Many birds also adapt to urban and suburban environments, with species like cardinals and finches frequenting backyard feeders. The diversity of habitats ensures that Michigan supports a broad variety of birdlife, catering to different ecological needs. Understanding these preferences aids in identifying species and appreciating their roles within specific ecosystems.

Regional Bird Distribution in Michigan

Michigan’s diverse geography supports varied bird populations across its regions. From forests to wetlands, each area attracts unique species, shaped by climate, habitat, and seasonal changes.

3.1. Birds of the Upper Peninsula

The Upper Peninsula (UP) of Michigan is a haven for bird enthusiasts, boasting a diverse range of species due to its vast forests, wetlands, and remote landscapes. The dense boreal forests attract birds like the Black-backed Woodpecker and Boreal Chickadee, while the open areas are home to species such as the Sandhill Crane and Sharp-tailed Grouse. The UP is also a critical stopover for migratory birds, including warblers and raptors. During spring and fall migrations, birders can spot rare visitors like the Eurasian Wigeon or Ross’s Goose. The region’s unique combination of habitats supports over 300 bird species, making it a must-visit destination for any serious birder.

3.2. Birds of the Lower Peninsula

The Lower Peninsula of Michigan is home to a wide variety of bird species, thanks to its diverse landscapes, including forests, grasslands, and wetlands. This region attracts both migratory and resident birds. Year-round residents like the American Robin and Downy Woodpecker are common, while migratory species such as the Ruby-throated Hummingbird and warblers pass through during spring and fall. Urban areas and backyard feeders also support species like the Northern Cardinal and Blue Jay. The mix of habitats ensures a dynamic birding experience, with opportunities to spot species adapted to deciduous forests, open fields, and even urban environments. This diversity makes the Lower Peninsula a key destination for birdwatchers in Michigan.

3.3. Birds of the Great Lakes Shorelines

Michigan’s Great Lakes shorelines are a haven for waterfowl, gulls, and migratory birds. Species like the Common Loon and Piping Plover thrive in these coastal areas. The shoreline’s mix of sandy beaches, rocky edges, and wetlands supports a variety of birdlife. During migration, the Great Lakes act as a critical stopover for birds traveling between breeding and wintering grounds. Rare species, such as the Black Scoter, can be spotted during these periods. The shoreline’s unique ecosystems attract both residents and visitors, making it a focal point for birding enthusiasts. Conservation efforts are essential to protect these habitats and ensure the continued diversity of avifauna in the region.

3.4. Birds of the Michigan Wetlands

Michigan’s wetlands are vital habitats for numerous bird species, providing breeding, feeding, and migratory stopover points. These areas are home to herons, egrets, and waterfowl like ducks and geese. The wetlands also support shorebirds such as sandpipers and plovers during migration. Birds like the American Bittern and Least Bittern thrive in marshy environments, while ospreys and bald eagles frequent wetland edges. Wetlands are critical for species recovery, as seen with the Great Egret and Trumpeter Swan. Birders should use binoculars to spot these species without disturbing habitats. Visiting during spring and fall migrations offers prime opportunities to observe a wide variety of wetland birds.

Seasonal Variation in Bird Populations

Michigan’s bird populations vary significantly by season, influenced by migration patterns and habitat availability. This diversity creates dynamic birdwatching opportunities throughout the year.

4.1. Spring Migration

Michigan’s spring migration typically occurs from late March to early June, with peak activity in April and May. During this period, numerous bird species return from their southern wintering grounds to breed in the state’s diverse habitats. Warblers, tanagers, and orioles are among the most colorful migrants, while raptors like hawks and eagles soar overhead. Key stopover locations, such as the Upper Peninsula and Lake Michigan shorelines, provide critical resting and feeding areas. Wetlands and forests are particularly vital for waterfowl and songbirds. This migration is essential for replenishing breeding populations and offers exceptional opportunities for birders to observe a wide variety of species in their vibrant spring plumage.

4.2. Summer Breeding Season

Summer in Michigan marks the peak breeding season for many bird species. Warm weather and abundant food sources create ideal conditions for nesting and raising young. Birds exhibit vibrant plumage and territorial behaviors, with males often displaying elaborate courtship rituals. Species like the American Robin, Red-winged Blackbird, and Yellow Warbler are particularly active, building nests in diverse habitats. Wetlands, forests, and backyards become hubs of activity as birds focus on reproduction. This period is crucial for population growth, with many species raising multiple broods. Birders can observe fledglings learning to fly and forage, making summer a rewarding time for observing avian life cycles and behaviors;

4.3. Fall Migration

Fall migration in Michigan is a spectacular season for birdwatchers, as millions of birds travel southward. This period, spanning late summer to early fall, sees species like warblers, tanagers, and orioles passing through. Birds of prey, such as hawks and eagles, are also common during this time. The Great Lakes shoreline becomes a critical stopover for waterfowl and songbirds, offering abundant food and shelter. Key hotspots include places like Whitefish Point and Tawas Point, where birders can witness large concentrations of migratory species. Fall migration highlights the importance of Michigan’s ecosystems in supporting birds during their journey to warmer climates.

4.4. Winter Residents

Michigan’s winter bird community includes hardy species adapted to cold climates. Birds like the Black-capped Chickadee, American Crow, and Downy Woodpecker remain year-round, relying on seeds, suet, and insects. Waterfowl such as Mallards and Black Ducks can be found in open water areas like rivers and lakeshores. Snowy Owls occasionally visit from the Arctic, while species like the Common Redpoll and Snow Bunting appear during irruptions. These birds exhibit unique behaviors, such as flocking together for foraging and protection. Winter residents play a crucial role in Michigan’s ecosystem, maintaining insect populations and seed dispersal. Their presence offers birders a chance to observe adaptations to harsh winter conditions in diverse habitats.

Popular Bird Species in Michigan

Michigan is home to a wide variety of bird species, attracting enthusiasts year-round. Its diverse ecosystems support both migratory and resident birds, offering vibrant plumage and unique behaviors to observe.

5.1. Year-Round Residents

Michigan is home to a variety of bird species that remain in the state throughout the year. These birds adapt to seasonal changes, foraging for food and shelter during harsh winters. Common year-round residents include the American Crow, Black-capped Chickadee, and Blue Jay, known for their bold colors and intelligent behavior. The Downy Woodpecker and Tufted Titmouse are frequent visitors to backyard feeders, while the White-breasted Nuthatch and Northern Cardinal add vibrant plumage to winter landscapes. These birds often nest in deciduous or mixed forests, urban areas, or even residential neighborhoods. Their presence provides consistent opportunities for birders to observe and study their behaviors year-round.

5.2. Migratory Visitors

Migratory birds bring vibrant diversity to Michigan’s skies each year. Species like warblers, tanagers, and orioles flock to the state during spring migration, while hawks, eagles, and waterfowl dominate fall skies.

These visitors rely on Michigan’s strategic location along major flyways, making it a critical stopover for rest and refueling. Some birds, like the Ruby-throated Hummingbird, pass through solely during migration, never staying to breed. This transient presence creates thrilling opportunities for birders to spot rare or uncommon species. Migratory birds also play essential roles in Michigan’s ecosystems, contributing to pollination, seed dispersal, and pest control. Their journeys highlight the interconnectedness of habitats across North America, making Michigan a key link in their survival and success.

5.3. Rare and Endangered Species

Michigan is home to several rare and endangered bird species, including the Kirtland’s Warbler and the Piping Plover. These birds face threats like habitat loss and climate change. Conservation efforts, such as habitat restoration and protected nesting sites, are critical to their survival. The Kirtland’s Warbler, once nearly extinct, has shown signs of recovery due to dedicated management. Meanwhile, the Piping Plover remains vulnerable, with only a few nesting pairs along Lake Michigan’s shores. Other rare species, like the Whooping Crane, occasionally appear in the state. Protecting these birds requires collaboration between state agencies, organizations, and the public to ensure their populations thrive. Continued advocacy and research are essential for their long-term survival.

Bird Identification Tips

Michigan birds showcase remarkable diversity. Identification relies on size, shape, plumage details, and behavioral traits. Observing these characteristics, along with bird calls and seasonal variations, enhances accurate identification and enriches birding experiences.

6.1. Using Field Marks

Identifying birds in Michigan often relies on field marks, which are distinctive physical features. These include plumage patterns, beak shapes, and tail lengths. Look for unique colors, stripes, or spots that set species apart. Size and posture can also be telling, as some birds have distinct silhouettes. Pay attention to wing bars, eye rings, and crown patterns, which are often key identifiers. Seasonal changes in plumage should be considered, as some birds molt, altering their appearance. By focusing on these field marks, birders can accurately distinguish between similar species, enhancing their ability to identify Michigan’s diverse avifauna effectively in the field.

6.2. Listening to Bird Calls

Listening to bird calls is a vital skill for identifying species in Michigan. Each bird produces unique vocalizations, from songs and chirps to whistles and trills. Understanding these sounds helps in recognizing birds, especially those that are less visible. Pay attention to the pitch, rhythm, and tone of the calls, as these can distinguish one species from another. Common sounds include the melodious songs of warblers, the distinctive “cheer” of the American Robin, and the repetitive calls of sparrows. Using field guides or apps that provide audio recordings can enhance your ability to identify birds by their calls. Experienced birders often rely on this method, as it can be more effective than visual identification. Over time, practice will improve your ability to recognize and interpret bird vocalizations, enriching your birdwatching experiences in Michigan.

Birding Hotspots in Michigan

Michigan offers diverse birdwatching opportunities across its varied landscapes. Key hotspots include Sleeping Bear Dunes, Pictured Rocks, and Seney National Wildlife Refuge, each attracting unique bird species.

7.1; National Parks and Wildlife Refuges

Michigan’s national parks and wildlife refuges are vital habitats for diverse bird species. Places like Sleeping Bear Dunes National Lakeshore and Pictured Rocks National Lakeshore offer stunning natural landscapes that attract birds such as waterfowl, songbirds, and raptors; Seney National Wildlife Refuge is renowned for its grasslands and wetlands, providing a sanctuary for migratory birds. The Detroit River International Wildlife Refuge is another key site, supporting waterfowl and shorebirds. These protected areas are essential for bird conservation and offer excellent opportunities for birdwatching. Visitors can explore trails, observe nesting sites, and experience the state’s rich avian diversity firsthand. Bring binoculars and a field guide to make the most of your visit!

7.2; Local Birding Trails

Michigan boasts an extensive network of local birding trails that cater to both seasoned birders and casual observers. These trails, often maintained by local communities or conservation groups, provide access to diverse habitats such as forests, wetlands, and shorelines. Trails like the Iron River Birding Trail and the Sleeping Bear Dunes Birding Trail offer scenic views and opportunities to spot species like the American Kestrel or the Black-capped Chickadee. Many trails are equipped with interpretive signs, bird feeders, and observation decks to enhance the birding experience; They also serve as vital connectors between larger birding routes, making Michigan a premier destination for bird enthusiasts.
Local birding trails are often free to access and provide a great way to explore Michigan’s natural beauty while enjoying its rich avifauna.

Conservation Efforts for Michigan Birds

Michigan’s conservation efforts focus on habitat preservation, research, and education to protect bird populations. Collaborative initiatives between organizations and communities aim to address climate change and human impact.

8.1. Threats to Bird Populations

Habitat loss, climate change, and pollution are major threats to Michigan’s bird populations. Urbanization and agriculture reduce natural habitats, disrupting nesting and feeding grounds. Climate change alters migratory patterns and food availability, while pesticides and plastic pollution harm bird health. Invasive species also pose a significant threat, competing for resources and altering ecosystems. Additionally, collisions with wind turbines and buildings contribute to bird mortality. These challenges highlight the urgent need for conservation efforts to protect Michigan’s avian diversity and ensure the survival of its bird species for future generations.

8.2. Local and National Conservation Initiatives

Michigan’s bird conservation efforts are supported by both local and national organizations. The Michigan Audubon Society and the Great Lakes Restoration Initiative work to protect habitats and reduce threats like pollution and climate change. National programs, such as the U.S. Fish and Wildlife Service’s migratory bird initiatives, also play a crucial role. These collaborations focus on preserving wetlands, forests, and coastal areas vital to bird populations. Citizen participation is encouraged through bird counts and habitat restoration projects, fostering a community-driven approach to conservation. Together, these efforts aim to safeguard Michigan’s avifauna for future generations while promoting biodiversity and ecosystem health.

Birding Tips and Essentials

Essential birding tips include patience, knowledge of habitats, and using binoculars. Carry a field guide for identification. Practice ethical birding to protect birds and their habitats.

9.1. Best Practices for Birdwatching

Successful birdwatching begins with patience and quiet movement to avoid startling birds. Always bring binoculars and use them responsibly. Respect birds by maintaining a safe distance to avoid stress. Stay on designated trails to protect habitats and avoid disturbing wildlife. Carry a field guide or use a birding app to aid in identification. Keep the environment clean by carrying out trash. Be mindful of nesting seasons and avoid disrupting nests. Dress appropriately for weather conditions and terrain. Early mornings and late afternoons are ideal for spotting birds. Stay observant and listen for calls, as they often reveal bird locations. Enjoy the experience responsibly to ensure the well-being of both birds and ecosystems.

9.2. Essential Gear for Birders

To fully enjoy birdwatching in Michigan, having the right gear is crucial. Binoculars are the most essential tool for observing birds at a distance. A field guide specific to Michigan’s bird species will help with identification. A spotting scope can be useful for detailed observations, especially for distant birds. A life list journal is handy for tracking sightings over time. Wear comfortable, weather-appropriate clothing and sturdy footwear for long walks. A camera or smartphone can capture memorable moments. Lastly, consider carrying bird attractants like seeds or a portable feeder to draw birds closer. These essentials will enhance your birding experience and make it more rewarding.

Resources for Michigan Birders

Michigan birders benefit from comprehensive field guides, online communities, and mobile apps. These resources provide detailed species information, real-time sightings, and identification tools, enhancing birdwatching experiences statewide.

10.1. Field Guides and Literature

Field guides are essential tools for identifying and understanding Michigan’s bird species. Popular options include the Sibley Guide to Birds and National Audubon Society Field Guide to Birds. These resources provide detailed descriptions, colorful images, and range maps to help birders recognize species accurately. Additionally, literature specific to Michigan, such as Birds of Michigan Field Guide by Stan Tekiela, offers localized insights. Many guides also include tips for identifying birds by plumage, behavior, and habitat. Online resources, like e-books and downloadable PDFs, are increasingly popular for their convenience. These materials are invaluable for both novice and experienced birders, enhancing the overall birdwatching experience in Michigan.

10.2. Online Communities and Apps

Online communities and apps have revolutionized birdwatching in Michigan. Popular platforms like Merlin Bird ID and eBird provide instant species identification and real-time sightings. Social media groups dedicated to Michigan birding offer forums for sharing experiences and tips. Apps like BirdLife and Audubon Birds enable users to track bird populations and connect with local birders. These digital tools enhance the birding experience, making it easier for enthusiasts to explore and learn about Michigan’s avifauna. Whether tracking rare species or planning trips, online resources are indispensable for modern birders.

Michigan offers a captivating world of birdlife, with its diverse habitats attracting over 400 species. From migratory wonders to year-round residents, the state’s unique geography enriches birdwatching experiences. Conservation efforts play a vital role in protecting these species and their habitats. By engaging with local birding communities and utilizing field guides, enthusiasts can deepen their appreciation for Michigan’s avian diversity. Whether you’re a seasoned birder or a curious beginner, the Great Lakes State promises endless opportunities to connect with nature’s beauty through its incredible birds.

wall art size guide

Discover how to enhance your space with perfectly sized wall art. This guide covers measuring, selecting sizes for rooms, and arranging multiple pieces for stunning layouts.

Understanding the Importance of Proper Sizing

Proper sizing of wall art is crucial for creating balance and harmony in a space. A well-sized piece ensures visual equilibrium, preventing the room from feeling overwhelmed or lacking focal points. It also enhances the artwork’s impact, making it a central element in the decor rather than an afterthought.

Incorrect sizing can disrupt the room’s aesthetics, making it feel either cluttered or empty. By choosing the right size, you create a cohesive atmosphere that reflects your personal style. This guide will help you achieve this balance, ensuring your wall art complements the space and elevates its overall appeal.

How to Measure Your Wall Space

Measuring your wall space accurately is the first step in selecting the right-sized wall art. Start by determining the width and height of the wall area where the art will hang. Use a tape measure or a digital tool to get precise dimensions. Consider the furniture or decor nearby, as the art should complement these elements without overwhelming them. Leave at least 6-12 inches of space around the artwork for a balanced look. If hanging multiple pieces, measure the total area they will occupy. Additionally, consider the orientation of the wall art—whether it should be landscape or portrait—based on the space. Accurate measurements ensure the art fits seamlessly, creating a harmonious and visually appealing environment.

Key Considerations for Choosing Wall Art Size

When selecting wall art size, balance is key. Consider the room’s purpose and scale of furniture. Large rooms can handle oversized art, while smaller spaces benefit from more modest sizes. The art’s proportions should complement nearby decor, ensuring it doesn’t overwhelm or get lost. Think about the style—bold pieces make statements, while smaller art creates subtlety. Also, factor in the viewer’s distance; larger art is better for high-traffic areas. Personal preference matters too, as the art should reflect your taste. By harmonizing size with space and style, you create a cohesive, inviting atmosphere that enhances your home’s aesthetic.

Selecting the Right Size for Different Rooms

Different rooms require tailored wall art sizes. Living rooms often feature larger art, while bedrooms prefer more intimate pieces. Kitchens and hallways benefit from medium-sized works.

Living Room Wall Art Size Recommendations

The living room is a focal space, so choosing the right wall art size is crucial. For a standard sofa, a piece measuring 60-80 inches wide is ideal. If your wall is larger, consider an oversized art piece up to 100 inches wide for a bold statement. Horizontal art works well above sofas, while vertical pieces can accentuate tall ceilings. Ensure the art is at least 50-60% of the sofa’s width for visual balance. Mixing multiple smaller pieces can create a dynamic gallery wall, but maintain spacing of 2-3 inches between frames for a cohesive look. Always measure your wall and furniture before selecting to avoid sizing mishaps.

Bedroom Wall Art Size Guide

The bedroom is a personal sanctuary, and wall art sizing plays a key role in creating a serene atmosphere. For a queen-sized bed, opt for art that is 40-60 inches wide, while a king-sized bed pairs well with pieces 60-80 inches wide. Place the artwork 6-12 inches above the bed frame for optimal viewing. Consider vertical art to complement tall ceilings or horizontal pieces for a cozy feel. In smaller bedrooms, choose art that is 24-40 inches wide to avoid overwhelming the space. For a gallery wall, use 3-5 smaller pieces spaced 2-4 inches apart. Ensure the art aligns with the room’s decor and furniture proportions for a balanced look.

Kitchen and Dining Area Wall Art Sizes

When selecting wall art for the kitchen or dining area, choose sizes that complement the space without overwhelming it. Above a standard dining table, a piece measuring 30-40 inches wide is ideal. In smaller kitchens, opt for art that is 18-24 inches wide to maintain a sense of openness. For larger spaces, consider a statement piece up to 48 inches wide. Place the artwork 24-36 inches above the table or countertop for visual balance. Horizontal art works well in elongated spaces, while vertical pieces can add height. Ensure the art’s style and color align with the room’s decor, such as vibrant hues for a modern kitchen or neutral tones for a traditional dining area. This creates a harmonious and inviting atmosphere.

Hallway and Staircase Wall Art Dimensions

Hallways and staircases offer unique spaces for wall art, requiring careful sizing to enhance flow and aesthetics. For narrow hallways, opt for smaller pieces, 12-24 inches wide, to avoid clutter. In wider areas, larger art up to 40 inches wide can make a statement. When placing art on stairs, consider the height of each step; a good rule is to center pieces 48-60 inches from the floor. For a cohesive look, use consistent frame styles and spacing between pieces. Horizontal art can elongate the space, while vertical pieces draw the eye upward. Grouping multiple small works in a series adds visual interest without overwhelming the area, creating a balanced and welcoming atmosphere in these transitional spaces.

Understanding Standard Wall Art Sizes

Standard wall art sizes range from small, like 12×12 inches, to large, such as 48×60 inches, offering versatility for various spaces while ensuring easy framing and cost-effectiveness.

Common Wall Art Sizes for Small Spaces

For small spaces, wall art sizes typically range from 12×12 inches to 24×36 inches, ensuring they fit neatly without overwhelming the area. These dimensions are ideal for apartments, hallways, or cozy nooks. A 16×20-inch piece is a popular choice, offering enough presence to enhance the room without dominating it. When selecting art for small spaces, consider the wall’s visibility and the room’s purpose. For instance, a narrow hallway might benefit from a longer, vertical piece, while a compact living area could use a square or rectangular frame. Always measure your wall and furniture to maintain balance and harmony, ensuring the art complements the space rather than overwhelming it.

Medium-Sized Wall Art Dimensions

Medium-sized wall art typically ranges from 24×36 inches to 36×48 inches, offering a balanced option for various spaces. These dimensions are versatile and work well in living rooms, dining areas, or bedrooms. A 30×40-inch piece is a popular choice, as it provides enough visual impact without overwhelming the room. For smaller rooms, a 24×36-inch artwork can add elegance without feeling cramped. When selecting medium-sized art, consider the wall’s proportions and surrounding furniture to ensure harmony. For example, a 36×48-inch piece pairs well with larger furniture or open spaces, while a 24×36-inch frame complements smaller areas. This size range is ideal for creating a focal point while maintaining balance in your decor.

Large Wall Art Sizes for Bold Statements

Large wall art sizes are perfect for making a dramatic impact in any room. These pieces typically range from 40×50 inches to 60×72 inches or larger, creating a striking focal point. A 48×60-inch artwork is a popular choice for living rooms or grand staircases, while a 60×72-inch piece can dominate an open-concept space. When selecting large wall art, ensure it aligns with the room’s proportions to avoid overwhelming the area. For example, a 40×50-inch frame works well in medium-sized rooms, while larger spaces can accommodate 72×90-inch or even bigger pieces. Large wall art is ideal for empty walls, as it draws attention and adds personality to the space. Proper placement and spacing are key to achieving a balanced look.

Oversized Wall Art Measurements

Oversized wall art measurements are designed to make a significant visual impact, often exceeding standard large sizes. These pieces typically start at 72×90 inches and can go up to 96×120 inches or more, depending on the space. Oversized art is ideal for expansive rooms, high ceilings, or open-concept areas where a bold statement is desired. When choosing oversized wall art, ensure it complements the room’s scale to avoid overwhelming the environment. For instance, a 72×90-inch piece works well in spacious living areas or foyers, while a 96×120-inch artwork can dominate large, open spaces. Proper installation is crucial, as these pieces are heavy and require sturdy hanging methods. Always measure your wall and consider professional help for installation to ensure safety and balance.

Creating Stunning Layouts with Multiple Pieces

Arrange wall art thoughtfully to create visual harmony. Balance sizes, frame styles, and spacing for a cohesive look that enhances your room’s aesthetic and atmosphere.

How to Arrange Multiple Wall Art Pieces

Arrange wall art thoughtfully to create visual harmony. Balance sizes, frame styles, and spacing for a cohesive look that enhances your room’s aesthetic and atmosphere. Start by choosing a focal piece, then complement it with smaller, related works. Experiment with symmetrical or asymmetrical layouts depending on the space. Ensure spacing is consistent, typically 2-4 inches apart. Mix frame styles and shapes to add depth, but maintain a unified theme. For larger walls, group pieces together to form a gallery. Always consider the room’s decor and furniture to ensure the arrangement feels intentional and balanced, creating a stunning visual display that draws the eye naturally.

Calculating Spacing Between Artwork

To achieve a balanced arrangement, start by measuring the wall and artwork dimensions. A common guideline is to leave 2-4 inches between pieces. For larger walls or smaller art, increase spacing; for smaller walls or larger art, reduce it. Consider the style: modern settings might prefer minimal spacing, while traditional settings could use more. Frames also play a role—slim frames allow tighter spacing, while thicker frames need more room. Maintain consistent spacing, both horizontally and vertically, especially if pieces are hung at different heights. Use tools like paper templates or sticky notes to plan and visualize the layout before hanging. Plan carefully, sketch the arrangement, and ensure the display is visually pleasing and balanced.

Balancing Different Sizes in a Layout

Balancing different sizes in a wall art layout requires careful planning. Start by designating a focal point, often the largest piece, to anchor the arrangement. Surround it with smaller pieces, ensuring visual harmony. Varying sizes create dynamism, but scale must align with the room’s proportions. For a cohesive look, maintain consistent spacing and frame styles. Experiment with grouping similar themes or colors to unify diverse sizes. Consider symmetry for a polished appearance or asymmetry for a modern feel. Use templates or mockups to test arrangements before hanging, ensuring each piece complements the others without overwhelming the space. Balance is key to creating a visually appealing and harmonious display that enhances the room’s decor and functionality. Plan meticulously to achieve a stunning, well-balanced layout.

Considerations for Furniture and Decor

Wall art size must align with furniture and decor to create a balanced, harmonious space, ensuring the art complements the room’s aesthetic without overwhelming it.

Matching Wall Art Size with Furniture Dimensions

When selecting wall art, consider the dimensions of surrounding furniture to ensure harmony. For instance, a large sofa can be paired with a similarly scaled piece, while a petite side table calls for smaller art. Measure the width of the furniture and aim for art that is 50-75% of that width to maintain balance. Additionally, the height of the art should align with the eye level of the room, typically around 57-60 inches from the floor. This ensures the art complements the space without overwhelming it, creating a cohesive and visually appealing environment.

How to Choose Wall Art Size Based on Room Decor

Selecting wall art size based on room decor involves harmonizing with the space’s aesthetic and functional needs. Consider the room’s style—modern, minimalist, or traditional—and ensure the art complements it. For example, a minimalist room benefits from clean, simple pieces, while bold, oversized art can enhance a modern space. Measure the wall and furniture, then choose art that fills 60-70% of the wall area to avoid a cluttered look. Use online size guides or templates to visualize the fit before purchasing. Balancing scale and style ensures the art enhances the room’s decor and creates a cohesive, inviting atmosphere. Always align the art’s proportions with the room’s dimensions for a polished finish.

Visual Balance and Proportion

Visual balance and proportion in wall art ensure harmony within a space, making rooms feel cohesive and aesthetically pleasing through thoughtful size and placement choices.

Understanding Visual Weight in Wall Art

Visual weight refers to the perceived heaviness or prominence of a piece in a room. Larger or darker wall art creates more visual weight, drawing attention and anchoring spaces, while smaller or lighter pieces blend subtly. Balancing visual weight ensures a room feels harmonious. Properly distributing weight prevents spaces from feeling cluttered or empty. For example, oversized art can dominate, making it ideal for statement walls, whereas smaller pieces suit minimalist settings. Understanding this concept helps in selecting sizes that complement room decor and furniture. It’s crucial for achieving a balanced, visually appealing environment that aligns with personal style and design goals. This ensures art enhances, not overwhelms, the space.

Creating Harmony with Wall Art Sizes

Creating harmony with wall art sizes involves balancing scale, proportion, and visual flow. Mixing different sizes thoughtfully ensures a cohesive look, guiding the eye naturally through the space. A focal point, like a large statement piece, anchors the room, while smaller works complement it without overwhelming. Proper spacing and alignment are key to maintaining balance. Avoid overcrowding, as it disrupts harmony. Instead, let each piece breathe, allowing the sizes to create a sense of rhythm. This approach prevents clutter and ensures art enhances the room’s ambiance. By considering size ratios and placement, you can craft a visually pleasing arrangement that reflects personal style and elevates the space aesthetically.

Additional Tips and Resources

Utilize free printable guides, explore affordable art resources, and leverage online tools to find the perfect wall art size for your space effortlessly, enhancing your home decor.

Free Printable Wall Art Size Guide

A free printable wall art size guide is an invaluable resource for anyone looking to enhance their space with perfectly sized artwork. This handy guide provides standard wall art sizes, aspect ratios, and spacing tips to ensure your pieces look their best. Whether you’re an Etsy seller or a homeowner, this guide simplifies the process of selecting the right dimensions for your walls. It includes templates and charts to help you visualize how different sizes will fit in your room. Download the guide to explore popular formats, from small prints to oversized canvases, and discover how to create a cohesive look. With this tool, you’ll never second-guess your wall art choices again!

Where to Find Affordable Large-Scale Art

Finding affordable large-scale art doesn’t have to break the bank. Online platforms like Etsy and Society6 offer a wide range of oversized prints and canvases at budget-friendly prices. Many emerging artists also sell their work directly through their websites or social media channels, often at lower costs than traditional galleries. Additionally, outlets like IKEA and Amazon provide cost-effective options for large wall art. For those looking to invest in unique pieces, local art fairs and student exhibitions are great sources for affordable yet high-quality large-scale art. With a little research, you can find stunning oversized artwork that fits your style and budget, transforming your space without compromising on quality or design.

Top Online Resources for Wall Art Sizing

When searching for the perfect wall art size, utilize top online resources to guide your decision. Websites like Society6 and Etsy offer size charts and customizable options to fit your space. Platforms such as Art.com provide detailed sizing guides and room visualizers to help you choose the right piece. Additionally, tools like RoomSketcher allow you to create a digital layout of your room, ensuring your artwork fits perfectly. Many blogs and design websites, such as The Spruce, share expert tips on selecting sizes based on room dimensions and decor. These resources empower you to make informed decisions and find the ideal wall art size for your home.

the taming of rebecca parents guide

This guide explores the controversial 1982 film, addressing its explicit sexual content, abuse themes, and bleak narrative, helping parents understand its mature and disturbing elements for informed decisions.

Overview of the Movie and Its Content

The Taming of Rebecca is a controversial 1982 film known for its graphic and disturbing content, including explicit sexual abuse, violence, and bleak themes. The movie follows Rebecca, a young girl subjected to sexual abuse by her father, and later enrolls in a school where the headmaster exploits female students, portrayed as nymphomaniacs. The film is part of the “roughie” genre, characterized by its grim tone, horrifying power dynamics, and lack of hope or joy. Its graphic scenes are non-erotic, emphasizing the horrors of abuse rather than arousal. The content is deeply unsettling, making it essential for parents to be aware of its mature and potentially traumatic elements before allowing young viewers to watch.

Importance of a Parents Guide for This Film

A parents guide is crucial for The Taming of Rebecca due to its extreme content, including graphic sexual abuse, violence, and exploitation. The film’s bleak narrative and lack of hope make it emotionally challenging, especially for young audiences. Parents need to understand the film’s context to decide if it’s appropriate for their children. The guide helps them navigate discussions about sensitive topics and assess potential psychological impacts. It also provides insights into the film’s themes, aiding parents in preparing their children for the disturbing material. Without such guidance, viewers may be left unprepared for the film’s intense and distressing scenes, emphasizing the need for informed decision-making and open communication.

Content Warnings and Age Appropriateness

The Taming of Rebecca contains explicit sexual abuse, graphic violence, and disturbing themes, making it highly inappropriate for younger audiences. Parental discretion is strongly advised due to its mature content.

Sexual Content and Graphic Scenes

The Taming of Rebecca features explicit and prolonged scenes of sexual abuse, including graphic depictions of assault and exploitation. These scenes are deeply unsettling and non-erotic, often lasting for extended periods. The film’s content is particularly disturbing due to its unflinching portrayal of sexual violence, which is central to the narrative. Parents should be aware that the film does not shy away from detailing these acts, making it highly inappropriate for younger audiences. The lack of sensitivity in presenting such content raises significant concerns about its suitability for anyone under the age of 18. The graphic nature of these scenes ensures that the film is not merely suggestive but explicitly detailed, further emphasizing the need for parental caution.

Violence and Abuse Portrayal

The Taming of Rebecca contains intense and prolonged scenes of violence and abuse, which are central to its narrative. The film portrays physical and emotional abuse in a graphic manner, with no regard for sensitivity. These scenes are often brutal and unrelenting, leaving a lasting impact on viewers. The abusive power dynamics are a key element, showing exploitation and control in various settings. Parents should be cautious, as the film’s depiction of violence is not only explicit but also deeply disturbing. The lack of restraint in showing these acts makes the content highly unsuitable for young audiences. The overall presentation of abuse is harsh and unfiltered, contributing to the film’s bleak and unsettling atmosphere.

Nudity and Explicit Material

The Taming of Rebecca features extensive nudity and explicit content throughout, with graphic depictions of sexual acts that are neither subtle nor implied. The film’s scenes are highly detailed, leaving little to the imagination, and are often intertwined with the violent and abusive themes. This explicit material is not erotic but rather confrontational, emphasizing the dark and exploitative nature of the story. Parents need to be aware that the film’s content is intended for mature audiences only, and its explicit nature makes it entirely inappropriate for younger viewers. The sheer volume of graphic content underscores the necessity for parental discretion and careful consideration before allowing anyone to watch the film.

Themes and Tone of the Film

The Taming of Rebecca presents a dark, bleak narrative devoid of joy or hope, with a harsh tone that reflects its disturbing and exploitative content.

Dark and Bleak Narrative

The Taming of Rebecca is marked by a relentlessly grim and oppressive tone, with no moments of joy or redemption. The film’s narrative is deeply unsettling, focusing on exploitation and abuse without any semblance of hope or positivity. The pervasive bleakness creates an emotionally challenging experience, making it difficult for viewers to find any redeeming qualities. This darkness is not just thematic but also visual, with a grimy aesthetic that amplifies the sense of despair. The lack of any uplifting elements ensures the film remains a deeply uncomfortable and troubling watch, leaving a lingering sense of unease. Parents should be particularly cautious due to its unflinching portrayal of such a harsh and disturbing world.

Power Dynamics and Abuse of Authority

The Taming of Rebecca delves into disturbing power imbalances, particularly through the exploitation of authority figures. The film portrays how those in positions of control, such as the headmaster, misuse their power to manipulate and abuse vulnerable individuals. This dynamic is central to the narrative, highlighting systemic corruption and the mistreatment of women. The lack of accountability for these actions further exacerbates the sense of injustice, making the film’s themes particularly unsettling. Parents should be aware of these elements, as they may provoke strong reactions and require detailed discussions about consent, authority, and the consequences of abuse. The film’s unflinching portrayal of such issues makes it essential for parents to consider their child’s sensitivity and understanding before allowing them to watch.

Lack of Joy or Hope in the Storyline

The Taming of Rebecca is marked by an unrelenting bleakness, with no moments of joy or hope to offset its dark themes. The narrative is oppressive, leaving viewers with a sense of despair and hopelessness. This absence of redeeming qualities makes the film emotionally challenging, especially for younger audiences. The storyline’s relentless focus on abuse and exploitation creates a grim atmosphere that lingers long after the credits roll. Parents should be aware that this film does not offer any uplifting messages or resolutions, making it particularly unsuitable for sensitive viewers. The lack of joy or hope in the storyline adds to its overall mature and disturbing nature, emphasizing the need for careful consideration before allowing children to watch.

Guidance for Parents

Parents must assess their child’s sensitivity before exposing them to this film. Open discussions about its themes and ensuring understanding of its mature content are crucial for young viewers.

Recommended Age for Viewing

The film is highly inappropriate for young audiences due to its graphic sexual content, violence, and disturbing themes. It is recommended for mature viewers only, ideally those over 18 years old. The explicit nature of the content makes it unsuitable for minors, as it could lead to emotional distress or desensitization. Parents should exercise extreme caution and consider the sensitivity and maturity level of their child before allowing them to watch. The bleak and intense portrayal of abuse and power dynamics further emphasizes the need for age restrictions. This film is not intended for children or even teenagers, as it deals with adult themes that require a high level of emotional and psychological maturity to process.

Discussing the Film with Your Child

Discussing The Taming of Rebecca with your child requires sensitivity and care due to its mature themes. If they have viewed the film, create an open and non-judgmental space for them to share their thoughts and feelings. Address any questions they may have about the film’s content, such as its portrayal of abuse or power dynamics. Emphasize the importance of consent, respect, and healthy relationships, contrasting these with the film’s dark and exploitative narrative. Encourage them to reflect on how the film’s bleak tone and lack of hope differ from real-life values and experiences. This conversation can help them process the film’s disturbing elements and reinforce positive moral guidance. Ensure they understand the film’s context and that it does not represent acceptable behavior or outcomes in real life.

Understanding the Film’s Context

The Taming of Rebecca is a 1982 film known for its extreme and controversial content, falling under the “roughie” genre, which emphasizes harsh, non-erotic depictions of sex and violence. The film’s bleak and exploitative nature has led to its notoriety, often being compared to other provocative works like The Image and The Defiance. Critics highlight its disturbing portrayal of power dynamics, abuse, and lack of hope, making it a challenging watch even for mature audiences. Understanding this context is crucial for parents to grasp why the film is considered so problematic and why it warrants careful consideration before allowing young viewers to engage with it. The film’s historical and genre-specific background underscores its potential to cause emotional distress and its limited redeeming value.

Mature Themes and Their Implications

The Taming of Rebecca delves into deeply unsettling themes, including sexual abuse, nymphomania, and institutional power abuse, all presented with graphic intensity, raising significant concerns for young viewers’ emotional well-being and moral development.

Portrayal of Sexual Abuse

The Taming of Rebecca includes explicit and prolonged scenes of sexual abuse, particularly involving the protagonist, Rebecca, at the hands of her father and later at a school with predatory authority figures. These depictions are graphic, leaving little to the imagination, and are central to the film’s narrative. The abuse is portrayed without restraint, making the content highly distressing and inappropriate for younger audiences. The film’s unflinching approach to such sensitive topics raises significant concerns about its suitability for minors and the potential psychological impact on young viewers exposed to such material.

Nymphomania and Sexual Behavior

The Taming of Rebecca portrays nymphomania as a response to trauma, with Rebecca exhibiting hypersexual behavior following her abuse. The film includes explicit and prolonged sexual scenes, often blurring the lines between consensual and non-consensual acts. Female characters are frequently depicted as nymphomaniacs, reinforcing harmful stereotypes. The narrative suggests that sexual behavior is a coping mechanism for abuse, which can be misleading and problematic. These themes, combined with graphic content, create a dark and exploitative tone that may be deeply unsettling for young audiences. Parents should be aware of how the film framing of sexual behavior could influence impressionable viewers and consider the potential for misinformation or emotional distress.

Abuse of Power in Institutions

The Taming of Rebecca vividly portrays the abuse of authority within institutional settings, particularly the school where Rebecca seeks refuge. The headmaster exercises unchecked power, preying on vulnerable female students, including Rebecca, who have already suffered trauma. This dynamic highlights systemic failures and the exploitation of those in care. The film graphically depicts these abuses, emphasizing the lack of accountability and the pervasive corruption. Such themes can be deeply disturbing, especially for young viewers, as they reveal harsh realities about power imbalances and the mistreatment of minors. Parents must consider the film’s intense portrayal of institutional abuse and its potential to cause emotional distress or desensitization in children.

Psychological Impact on Young Viewers

The film’s graphic content and bleak themes may cause significant emotional distress in young audiences, potentially leading to desensitization or long-term psychological effects due to its intense nature.

Potential Emotional Distress

The film’s graphic and disturbing content may lead to significant emotional distress in young viewers. Scenes depicting sexual abuse, violence, and bleak power dynamics can evoke intense feelings of discomfort and fear. The lack of hope or joy in the narrative further amplifies the emotional toll, potentially leaving young audiences feeling unsettled or traumatized. Exposure to such material at an impressionable age could result in long-term psychological effects, including heightened sensitivity to violent or sexual content. Parents should be cautious, as the film’s unflinching portrayal of abuse and exploitation may deeply unsettle younger minds, making it crucial to assess a child’s readiness and provide guidance if exposure occurs.

Desensitization to Graphic Content

The film’s prolonged and explicit depiction of sexual abuse, violence, and exploitation may desensitize young viewers to graphic content. The repetitive and unflinching portrayal of such scenes can normalize disturbing imagery, reducing emotional responses to similar content in the future. This desensitization could lead to a diminished ability to recognize the severity of abuse or violence, potentially affecting a child’s perception of healthy relationships and boundaries. The film’s bleak and hopeless tone further exacerbates this risk, as it offers no catharsis or resolution, leaving viewers exposed to raw, unsettling material without context or relief. Over time, this exposure could contribute to emotional detachment or a lack of empathy, particularly if discussed or processed improperly by parents or guardians.

Long-Term Effects of Exposure

Exposure to the graphic and disturbing content in The Taming of Rebecca can have profound long-term psychological effects on young viewers. The film’s depiction of sexual abuse, exploitation, and bleak power dynamics may lead to lasting emotional trauma, anxiety, or a distorted understanding of relationships. Repeated exposure to such material can impair a child’s ability to form healthy attachments or recognize boundaries. Additionally, the film’s unrelenting darkness may contribute to a pessimistic worldview, affecting a child’s emotional development and resilience. Over time, this could manifest in difficulties with trust, intimacy, or coping with stress. Parents must consider these potential long-term consequences when deciding whether to allow their child to view the film, even as they approach the topic with sensitivity and guidance.

Certifications and Ratings

The Taming of Rebecca is rated NC-17 due to explicit sexual content, graphic scenes, and disturbing themes, with international certifications reflecting similar restrictions based on regional standards.

Global Ratings and Restrictions

The Taming of Rebecca has received varying ratings globally due to its explicit content. In the U.S., it is rated NC-17 for graphic sexual content and disturbing themes. In the UK, the film is likely to be banned or heavily cut by the BBFC due to its depiction of sexual abuse and non-consensual acts. Other countries have imposed similar restrictions, with some classifying it as adult-only content. The film’s graphic nature and bleak tone have led to strict ratings worldwide, reflecting its unsuitability for younger audiences. These global certifications highlight the film’s controversial and mature themes, emphasizing the need for parental discretion and awareness of regional restrictions.

Comparison of International Certifications

The Taming of Rebecca has faced strict ratings worldwide due to its explicit and disturbing content. In the U.S;, the film is rated NC-17 for graphic sexual content and themes of abuse. Similarly, in the UK, the BBFC has imposed severe cuts or outright banned the film due to its depiction of non-consensual acts and sexual violence. Other countries, such as Canada and Australia, have issued similarly restrictive ratings, classifying it as adult-only content. The film’s bleak and exploitative nature has led to uniform international consensus regarding its unsuitability for younger audiences. These certifications underscore the film’s controversial reputation and highlight the need for parental awareness of regional rating differences when considering exposure to such material.

The Taming of Rebecca is a deeply unsettling film with graphic content that warrants strict parental discretion. Its themes of abuse and exploitation make it unsuitable for young audiences, emphasizing the need for careful consideration before viewing. Parents should prioritize open discussions about its disturbing elements to provide context and guidance. Ultimately, the film’s bleak and exploitative nature underscores its inappropriateness for minors, highlighting the importance of protective measures and informed decision-making for families.

The Taming of Rebecca is a controversial film known for its explicit sexual content, graphic scenes, and bleak narrative. It portrays themes of abuse, power dynamics, and exploitation, making it highly unsuitable for young audiences. Parents should be aware of the film’s disturbing elements, including sexual abuse, violence, and nudity, which are depicted in a non-erotic and exploitative manner. The guide emphasizes the importance of discretion and open communication with children about the film’s content. Due to its mature and unsettling nature, it is recommended that only adults view the film, and even then with caution. The film’s lack of joy or hope further underscores its inappropriateness for minors, highlighting the need for protective measures and informed decision-making.

Final Recommendations for Parents

Parents are strongly advised to exercise extreme caution with The Taming of Rebecca due to its graphic and disturbing content. The film is unsuitable for minors and should only be viewed by adults who are fully aware of its exploitative nature. It is recommended to avoid exposing children to this film entirely, as it contains themes and scenes that are emotionally harmful and inappropriate for young audiences. Parents should prioritize open discussions about media content and guide their children toward more age-appropriate material. The film’s bleak tone and lack of redeeming value make it a poor choice for family viewing or educational purposes. Ultimately, parental discretion is crucial to protect minors from its harmful influences.

ni no kuni 2 trophy guide

Welcome to the Ni no Kuni 2 Trophy Guide! This guide will help you navigate the world of Revenant Kingdom and unlock all achievements․ Discover tips, strategies, and essential steps to efficiently earn every trophy․ Whether you’re a seasoned player or new to the series, this guide ensures a smooth journey to the coveted platinum trophy․

1․1 Overview of the Game and Trophy System

Ni no Kuni II: Revenant Kingdom is a charming RPG with a unique mix of exploration, combat, and kingdom-building․ The trophy system includes 51 offline achievements, focusing on story progression, exploration, and specific tasks․ With no missable trophies, players can enjoy the game without strict precautions, though careful planning is advised for certain milestones, like accumulating 500,000 gold for the Royal Mint trophy․ Understanding the trophy system helps players navigate the game’s diverse challenges and collectibles effectively․

1․2 Importance of Planning and Efficiency

Planning and efficiency are crucial for earning the platinum trophy in Ni no Kuni 2․ With an estimated 80-hour completion time, organizing your progress ensures minimal backtracking․ Focus on completing side quests and errands early to avoid missing opportunities․ Managing your kingdom’s resources wisely and avoiding unnecessary spending will help meet financial requirements like the Royal Mint trophy․ A structured approach to battles, skirmishes, and collectibles saves time and reduces frustration, making your journey to the platinum trophy smoother and more enjoyable․

Platinum Trophy Roadmap

Your journey to the Platinum Trophy begins here․ This roadmap outlines the path to achieving all trophies efficiently․ With a difficulty rating of 3․5/10, the platinum requires approximately 80 hours of gameplay, focusing on story progression, side quests, and specific achievements․ Organize your playthrough to avoid unnecessary grinding and ensure all requirements are met seamlessly․

2;1 Estimated Trophy Difficulty and Time Requirement

The Ni no Kuni 2 trophy journey is moderately challenging, with a difficulty rating of 3․5/10․ Completing the platinum trophy requires approximately 80 hours of gameplay․ To streamline progress, consider grinding to level 95 for the challenging 10th Dreamer’s Door Maze․ This preparation significantly reduces difficulty․ Note that all trophies are offline, with no online requirements․ Plan your playthrough strategically to avoid unnecessary replays and ensure efficient progression toward the platinum trophy․

2․2 Offline vs․ Online Trophies

In Ni no Kuni 2, all trophies can be earned offline, making it convenient for players without internet access․ The game features 51 offline trophies, including story, side quests, and collectibles, with no online-specific achievements․ This ensures a stress-free experience, as there are no requirements for multiplayer or online play․ Focus on completing the story, upgrading your kingdom, and exploring the world to unlock all trophies seamlessly․ No online connectivity is needed, making it an ideal platinum journey for offline enthusiasts․

2․3 Missable Trophies and Precautions

While Ni no Kuni II has no strictly missable trophies, certain achievements require careful planning․ The Royal Mint trophy demands 500,000 gold simultaneously, so avoid excessive spending until this is achieved․ Regularly save your progress to prevent losing progress in case of errors․ Be cautious with quests tied to specific story moments, as missing them may require replaying sections․ Plan your upgrades and resource management wisely to avoid unnecessary grinding later․

Story-Related Trophies

Story-related trophies in Ni no Kuni 2 are earned by progressing through the game’s narrative․ These trophies unlock naturally as you complete key story chapters and milestones․

3․1 Trophies Linked to Main Story Progression

Several trophies in Ni no Kuni 2 are tied to completing key story milestones․ These include achieving specific objectives during the main campaign, such as “The First Step” for becoming a king and “Kingdom Builder” for establishing Evermore․ These trophies are unmissable as long as you progress through the story naturally․ Focus on following the narrative and completing quests without deviation to unlock these achievements seamlessly․ No additional steps or precautions are required beyond normal story progression․

3․2 Tips for Efficient Story Completion

Complete quests in order to avoid missing key story progression․ Regularly manage resources and upgrade equipment to ensure smooth combat encounters․ Focus on building your kingdom early, as it unlocks essential facilities․ Avoid skipping cutscenes, as they provide crucial story context․ Save frequently to avoid losing progress․ Prioritize main story quests over side content initially to maintain a steady pace․ Balancing exploration with story progression will keep the journey enjoyable and efficient․

Side Quest and Errand Trophies

Complete over 90 side quests and errands to unlock trophies․ These quests vary from helping citizens to uncovering hidden plots․ Focus on completion for XP and items․ Always check your quest log to avoid missing any, as they are crucial for progression and achieving the platinum trophy․

4․1 Completing Side Quests and Errands

Completing all side quests and errands is crucial for unlocking specific trophies․ These quests become available as you progress through the game and often reward valuable items or kingdom upgrades․ Ensure you explore every region thoroughly and interact with NPCs, as some quests are easy to miss․ Managing your kingdom’s economy wisely is also essential, as certain trophies require accumulating a large amount of money simultaneously․ Regularly saving your progress is recommended to avoid losing valuable resources or progress․

4․2 Specific Trophy Requirements

Several trophies in Ni no Kuni 2 are tied to completing specific side quests and errands․ For example, ‘The Prince of Wistaria’ requires befriending 50 citizens, while ‘The Art of Getting Lost’ demands completing 30 side quests․ Ensure you track these as you progress, as some may have unique conditions․ Prioritize quests tied to kingdom upgrades, like ‘Skilled Skirmisher’, which involves winning skirmishes․ Plan your progress to avoid missing any requirements and efficiently unlock these achievements․

Skirmish and Battle-Related Trophies

Earn trophies by mastering Skirmish battles and combat challenges․ Focus on upgrading tactics, equipment, and Higgledies to efficiently defeat enemies and achieve battle-related milestones in the game․

5․1 Achievements in Skirmish Battles

In Ni no Kuni 2, skirmish battles offer unique achievements that test your strategic skills․ Earn trophies like “Skirmish King” by winning 30 skirmishes or “Combo King” by achieving a 50-hit combo․ “Victory in Record Time” requires defeating 100 enemies within 3 minutes․ Use strong Higgledies and well-trained units to dominate these challenges․ Focus on upgrading your army and tactics to efficiently unlock these trophies and progress toward the platinum․

5․2 Combat-Related Trophy Requirements

To unlock combat-related trophies, focus on mastering battles and meeting specific criteria․ Defeat 1,000 enemies to earn the “Warrior of the World” trophy․ Achieve 50 flawless battles for “Flawless Victory․” Use advanced tactics like All-Out Attacks and Higgledy support effectively․ Win a battle without taking damage for “Untouchable․” Upgrade weapons and abilities to tackle tougher foes․ Exploit enemy weaknesses for efficient combat․ These achievements showcase your mastery of the game’s battle system and require both skill and strategy to accomplish․

Exploration and Collectible Trophies

Explore the vibrant world of Ni no Kuni 2 to uncover hidden collectibles and achievements․ Discover Higgledies, rare creatures, and secret locations to unlock exclusive trophies․ Efficient exploration is key to completing your collection without missing vital rewards․

6․1 Exploring the World and Collectibles

Exploring the vibrant world of Ni no Kuni 2 is crucial for uncovering its many secrets and collectibles․ These items are essential for various trophies and kingdom upgrades․ Use your skills and Higgledies to discover hidden areas; Efficient exploration requires a systematic approach, ensuring no region is left unvisited; Collectibles often reward valuable resources, so keep an eye out for sparkling objects․ Patience and thoroughness are key to maximizing your progress․ Enjoy the journey through Revenant Kingdom and uncover its hidden treasures!

6․2 Specific Collectible Trophy Requirements

To unlock all collectible-related trophies, focus on gathering Dreamer’s Door Mazes, Kingsglaive blades, and rare Higgledy allies․ The Dreamer’s Door requires completing challenging mazes, while Higgledies need specific items․ Ensure you collect all Kingsglaive blades by exploring hidden areas․ Additionally, amassing 500,000 guilders for the Royal Mint trophy is crucial․ Plan your progression carefully to avoid missing these collectibles, as some require specific conditions to unlock․ Use your kingdom’s upgrades to aid in efficient collection and tracking․

Kingdom Upgrades and Management

Upgrading Evan’s kingdom is crucial for progression․ Focus on buildings like the Royal Mint and Evermore Outfitters to boost resources and crafting capabilities․ Efficiently manage your kingdom’s economy by gathering materials and recruiting citizens to unlock advanced upgrades and achievements․

7․1 Upgrading Evan’s Kingdom

Upgrading Evan’s kingdom is a core aspect of Ni no Kuni 2․ Focus on constructing and enhancing buildings like the Royal Mint, Outfitters, and Evermore Pavilion․ Recruiting citizens and assigning them to roles boosts productivity․ Regularly collect resources from upgraded facilities to maintain progress․ Efficiently manage your kingdom’s growth to unlock new items, spells, and abilities․ Prioritize buildings that support your playstyle and trophy requirements to ensure a smooth journey to the platinum trophy․

7․2 Managing the Kingdom’s Economy

Managing the kingdom’s economy in Ni no Kuni 2 is crucial for progression and trophies․ Focus on optimizing resource allocation to maximize gold and item production․ Regularly upgrade facilities like the Royal Mint to boost income․ Assign citizens to roles that match their skills to enhance efficiency․ Avoid unnecessary spending, especially before achieving the 500,000 gold requirement for a specific trophy․ Keep track of your kingdom’s funds and ensure a steady income stream to unlock advanced upgrades and achievements seamlessly․

Higgledy Trophies

Earn trophies by unlocking and upgrading Higgledies․ These charming creatures aid in battles and exploration․ Use items like shinies to enhance their abilities and unlock specific achievements․

8․1 Unlocking and Upgrading Higgledies

Higgledies are charming creatures that aid Evan and his companions․ To unlock Higgledies, complete specific side quests or explore hidden areas in the world․ Each Higgledy has unique abilities, such as healing or boosting combat stats․ Upgrading Higgledies requires feeding them items like sparkles or rare materials․ Regular upgrades enhance their powers and unlock new skills․ Focus on leveling up your favorite Higgledies early to maximize their benefits in battles and exploration․ Proper management of Higgledies is key to achieving certain trophies related to their abilities and contributions․

8․2 Specific Higgledy-Related Achievements

Earning Higgledy-related trophies requires focusing on their abilities and usage in Ni no Kuni 2․ One achievement involves recruiting all 30 Higgledies, which unlocks the “Higgledy Hero” trophy․ Another requires using Higgledy skills to solve puzzles and defeat enemies creatively․ Experiment with combinations to unlock the “Higgledy Hustler” trophy․ Ensure you explore thoroughly and experiment with Higgledy abilities to meet all criteria efficiently․ These achievements add depth to your journey and showcase the unique charm of Higgledies in the game․

Crafting and Upgrading Equipment

9․1 Crafting System Overview

Crafting in Ni no Kuni 2 involves alchemy and Higgledy workers․ Gather resources to create weapons, armor, and items essential for progression and combat․ Mastering crafting is key․

9․2 Upgrading Equipment for Trophies

Upgrade equipment to unlock specific trophies․ Use rare materials and blueprints to enhance gear, ensuring your party is well-prepared for challenging battles and achievement requirements․

The crafting system in Ni no Kuni 2 is a core feature that allows you to create weapons, armor, and items essential for progression․ By gathering resources from exploration, battles, or kingdom upgrades, you can craft equipment tailored to your playstyle․ Each recipe requires specific materials, and upgrading gear enhances its stats․ Crafting also plays a role in achieving certain trophies, making it a vital part of your journey to the platinum․ Mastering this system ensures you’re well-prepared for challenges ahead!

Upgrading equipment is crucial for tackling challenging content and earning specific trophies․ Focus on crafting high-level gear using rare materials like Twinklestones and Stardust․ The Dreamer’s Door maze offers exclusive items for weapon upgrades․ Utilize the kingdom’s crafting system to enhance weapons and armor, ensuring your party is well-prepared for battles․ Regularly check equipment requirements for trophies like “Arms Dealer” and “Dressed to Impress”․ Efficient resource management, including Kingsguilders, is key to avoiding unnecessary grinding․

Challenging Content Trophies

Conquer the toughest challenges in Ni no Kuni 2, including the notorious 10th Dreamer’s Door maze․ This section provides tips to overcome these difficult achievements․»

10․1 Completing the Toughest Challenges

Conquering the toughest challenges in Ni no Kuni 2 requires careful preparation and strategy․ The 10th Dreamers Door Maze is notably demanding, pushing your party to its limits․ Grinding to level 95 before attempting this ensures a smoother experience․ Focus on upgrading your equipment and mastering battle tactics․ Specific trophies like Royal Mint demand precise resource management, so plan accordingly․ Stay patient, as these challenges test both skill and persistence, but the rewards are well worth the effort․

10․2 Tips for Difficult Trophy Requirements

Conquering challenging trophies requires patience and strategy․ Focus on leveling up your party to at least level 95 before tackling the 10th Dreamer’s Door maze․ Avoid spending money early to ensure you meet the Royal Mint trophy requirement of 500,000 gold․ Utilize Higgledies strategically in tough battles and explore all side quests thoroughly․ Grinding in skirmishes and equipping superior gear will also aid in overcoming difficult content․ Stay patient and systematic to achieve every trophy efficiently․

Congratulations! You’ve reached the end of the Ni no Kuni 2 Trophy Guide․ Remember to stay patient, enjoy the journey, and don’t hesitate to explore․ Good luck on your platinum adventure!

11․1 Summary of Key Tips

Plan your progression carefully to avoid missing trophies․ Complete side quests early to boost your kingdom and characters․ Focus on upgrading your weapons and Higgledies consistently․ Explore thoroughly for collectibles and hidden items․ Manage your kingdom’s economy wisely to avoid financial shortages․ Prioritize leveling up your party before tackling challenging content․ Stay organized and use checkpoints to track your progress․ Efficient time management is crucial for achieving the platinum trophy without unnecessary grinding․

11․2 Final Words on Achieving the Platinum

Congratulations! Earning the platinum trophy in Ni no Kuni 2 is a testament to your dedication and skill․ This journey through Revenant Kingdom has been both challenging and rewarding․ Remember, patience and careful planning are key to overcoming every obstacle․ Enjoy the satisfaction of completing all achievements and take pride in your accomplishments․ The world of Ni no Kuni 2 is rich with wonder, so continue to explore and savor the magic of Evan’s kingdom․

isotoner slipper size guide

Isotoner slippers are renowned for their exceptional comfort and versatile designs, offering multiple colors and sizes to suit every preference. Popular worldwide, they provide soft, cushioned support and are highly rated for their durability and style, making them a top choice for both casual and seasonal wear.

Overview of Isotoner Brand

Isotoner is a trusted brand known for its high-quality, comfortable footwear, with a legacy spanning over 15 years in the market. Originating in England, the brand specializes in creating stylish and durable slippers that cater to diverse preferences. Isotoner offers a wide range of designs, including popular styles like Satin Ballerina Slippers, available in multiple colors and sizes. The brand emphasizes exceptional comfort, cushioning, and support, making its products a favorite for both casual and seasonal wear. With a strong commitment to customer satisfaction, Isotoner ensures reliable fit guides and sizing options, while also providing benefits like free delivery and insurance on purchases.

Importance of Proper Sizing for Comfort

Proper sizing is essential for ensuring maximum comfort and support in Isotoner slippers. Ill-fitting slippers can lead to discomfort, blisters, or even foot pain, undermining the intended relaxation they provide. Correct sizing ensures the foot rests naturally, with adequate room for toes to move without pressure. Isotoner’s designs, such as the Satin Ballerina Slippers, prioritize cushioning and support, but these benefits are maximized only when the size is accurate. With options in multiple colors and sizes, Isotoner caters to various preferences, but proper fit is key to enjoying their durability and style. Choosing the right size ensures a snug yet comfortable fit, enhancing the overall wearing experience and extending the lifespan of the slippers.

Understanding the Isotoner Size Chart

Isotoner’s size chart offers a straightforward guide to help customers find their perfect fit, ensuring comfort and support with accurate measurements for various styles and sizes.

Women’s Size Chart

Isotoner offers a comprehensive women’s size chart, ranging from size 5 to 12, ensuring a perfect fit for various foot shapes and preferences. The chart provides precise measurements for both length and width, catering to narrow, medium, and wide widths. Made from stretchable materials, Isotoner slippers adapt to your feet for ultimate comfort. The size guide helps determine the ideal fit, considering the natural expansion of the material. By measuring your foot accurately and comparing it to the chart, you can select the optimal size. This ensures your slippers feel comfortable and supportive, whether you’re lounging at home or running errands. Proper sizing enhances the overall wear experience, making Isotoner a top choice for comfort and style.

Men’s Size Chart

Isotoner’s men’s size chart offers a range from size 7 to 16, providing a broad fit for various foot sizes. The chart includes precise measurements for length and width, ensuring comfort and support. Isotoner slippers feature stretchable materials that mold to your feet, offering a snug yet comfortable fit. The size guide is designed to help you choose the perfect size, considering factors like toe room and cushioning. By measuring your foot and comparing it to the chart, you can ensure your slippers fit flawlessly. Whether you prefer a relaxed or secure fit, Isotoner’s size options cater to different preferences, making their slippers a reliable choice for everyday wear.

Unisex Size Options

Isotoner offers versatile unisex size options, catering to a wide range of foot sizes and preferences. These slippers are designed to provide universal comfort, making them ideal for sharing or for those who prefer a more relaxed fit. The unisex sizes typically range from 5 to 12, ensuring a snug and cozy experience for everyone. With materials like soft fabrics and cushioned insoles, Isotoner’s unisex slippers deliver exceptional warmth and support. They are perfect for casual wear and feature a timeless design that suits both men and women. Whether you’re looking for a gift or a personal treat, Isotoner’s unisex options offer flexibility and style combined with ultimate comfort.

Half Sizes and Fit Considerations

Isotoner slippers are available in half sizes, ensuring a more precise fit for enhanced comfort. These sizes cater to individuals whose feet fall between standard whole sizes, offering a snug yet roomy fit. The stretchable materials used in Isotoner slippers allow for slight adjustments, accommodating minor size variations. For those unsure between sizes, it’s recommended to opt for the next half size up, especially if you prefer a bit more toe room or have wider feet. This consideration ensures optimal comfort and prevents tightness. Half sizes are particularly beneficial for maintaining proper foot alignment and support, making Isotoner slippers a great choice for all-day wear.

How to Measure Your Foot Accurately

Stand upright, place your foot on paper, and trace its outline. Measure length from heel to longest toe and width at the widest point for the best fit.

Measuring Foot Length

Accurate foot length measurement is crucial for proper sizing. Stand upright, placing your foot flat on the floor. Use a ruler or Brannock device to measure from the back of the heel to the tip of the longest toe. Ensure the foot is in a natural position, not flexed or arched. For the best results, measure both feet, as they may differ slightly. Record the longest measurement to determine your size. This step ensures a comfortable fit, preventing tightness or excessive room in the toe box. Consider tracing your foot on paper and measuring the tracing for an alternative method.

Measuring Foot Width

Measuring foot width ensures a snug yet comfortable fit. Wrap a flexible measuring tape around the widest part of your foot, typically across the ball. Stand upright, distributing your weight evenly. The tape should be snug but not tight, forming a straight horizontal line. For accuracy, measure both feet and use the wider one. Record the measurement in inches or centimeters. This step is essential for selecting slippers that accommodate your foot’s natural width, preventing discomfort or slipping. If using a ruler, place the foot on paper, mark the widest points, and calculate the distance between them. Proper width measurement ensures optimal fit and comfort.

Measuring Foot Girth

Measuring foot girth involves determining the circumference around the widest part of your foot, typically around the metatarsal area. Use a flexible tape measure, ensuring it is snug but not overly tight. Stand upright, with your weight evenly distributed, to get an accurate reading. Wrap the tape measure horizontally around the foot, keeping it parallel to the floor. Record the measurement in inches or centimeters. Since left and right feet may differ slightly, measure both and use the larger circumference. This step is vital for ensuring the slipper fits comfortably without feeling too tight or restrictive. Accurate girth measurement helps prevent discomfort and ensures a proper fit for long-term wear.

Considering Left and Right Foot Differences

Most people have naturally asymmetrical feet, with one foot slightly larger than the other. To ensure the best fit, measure both feet separately and note any differences in length, width, or girth. Use the larger foot’s measurements when selecting your Isotoner slipper size. Ignoring foot differences can lead to discomfort or improper fit, as the smaller foot may feel too tight or the larger foot may feel too loose. Isotoner slippers are designed with stretchable materials to accommodate slight variations, but accurate measurements are still essential for optimal comfort and support. This step ensures your slippers feel tailored to your unique foot shape.

Factors Influencing Fit

Material stretchability, toe box space, and cushioning significantly impact comfort. Weight distribution, arch support, and activity levels also play a role in achieving the perfect fit for Isotoner slippers.

Stretchability of Isotoner Material

Isotoner slippers are crafted from highly stretchable materials, ensuring a snug yet comfortable fit. This flexibility accommodates foot shapes and sizes, providing ease of movement and reducing pressure points. The stretchy fabric molds to your feet, offering a personalized fit without compromising on support. Over time, the material retains its elasticity, maintaining the slippers’ shape and comfort. This feature is particularly beneficial for those with varying foot widths or who experience swelling, as it allows for a customizable fit. The stretchability enhances the overall wearability, making Isotoner slippers a practical choice for daily use. Proper sizing is still essential to maximize comfort.

Toe Box Space and Comfort

The toe box in Isotoner slippers is designed to provide ample space for toes to move naturally, ensuring comfort and preventing confinement. This feature is crucial for long-lasting wear, as it reduces pressure points and discomfort. The materials used in Isotoner slippers are soft and breathable, further enhancing the comfort of the toe box area. Proper toe box space is essential for maintaining healthy foot alignment and preventing issues like bunions or calluses. Isotoner slippers are praised for their roomy yet snug fit, making them ideal for all-day comfort. The design prioritizes both style and functionality, ensuring that the toe box contributes to an overall pleasant wearing experience.

Cushioning and Support Features

Isotoner slippers are crafted with premium cushioning to provide superior comfort and support. The insoles feature thick, soft padding that absorbs shock with each step, reducing fatigue and strain on the feet. Arch support is integrated to maintain proper foot alignment, while the plush materials ensure a luxurious feel. This cushioning is particularly beneficial for individuals with foot pain or conditions like plantar fasciitis. The balance of support and flexibility makes Isotoner slippers suitable for both indoor and light outdoor use. The cushioning also helps in maintaining the slippers’ shape over time, ensuring long-lasting comfort and support. This feature is a key reason for their popularity among consumers seeking durable, comfortable footwear.

Sizing Variations Across Styles

Isotoner offers diverse slipper styles, each with unique sizing to ensure a perfect fit. From snug ballerinas to roomy moccasins, sizes vary slightly depending on design.

Differences in Fit Between Slipper Styles

Different Isotoner slipper styles offer varying fits to cater to diverse preferences. Ballerina slippers tend to have a snug, form-fitting design, while moccasin styles provide a roomier toe box. Open-toe slippers allow for a more relaxed fit, ideal for warmer environments. Closed-toe options, such as bootie slippers, often feature adjustable closures for a secure fit. Additionally, seasonal styles like winter boot slippers may have thicker linings, which can affect sizing. It’s important to consider these differences when selecting a style to ensure optimal comfort and proper fit. Each design is crafted to enhance wearer comfort while maintaining the brand’s signature style.

Seasonal and Limited-Edition Sizes

Isotoner occasionally releases seasonal and limited-edition slippers, which may feature unique sizing options tailored to specific designs. These styles often include additional padding or specialized materials, such as thicker insulation for winter or breathable fabrics for summer. Limited editions may also introduce exclusive fits, like narrower or wider widths, to cater to particular foot shapes. Availability can vary, with certain sizes selling out quickly due to high demand. Customers are advised to check size charts specific to these collections, as they may differ slightly from standard sizes. Staying updated on releases ensures a better chance of securing the perfect fit during these special offerings.

Customer Reviews and Feedback

Customers praise Isotoner slippers for their comfort and style, with many highlighting accurate sizing as a key feature. Reviews often emphasize the importance of proper fit for optimal comfort and durability, ensuring a satisfying purchase experience.

Common Complaints About Sizing

Some customers report that Isotoner slippers run slightly smaller than expected, leading to tight fits. Others mention inconsistencies between sizes across different styles. A few users find the half-size options insufficient, while some note that the slippers may stretch over time, affecting their initial fit. Additionally, variations in foot shapes can cause discomfort, as the standard size chart may not accommodate uniquely shaped feet. Addressing these issues requires careful measurement and consideration of individual foot characteristics before making a purchase.

How to Avoid Common Fitting Issues

To ensure a perfect fit, measure your feet accurately using the Isotoner size chart. Consider both length and width, as well as any foot shape peculiarities. Try slippers on in the afternoon, as feet tend to swell during the day. If purchasing online, read customer reviews for specific styles to gauge sizing accuracy. For in-store purchases, wear the same type of socks you plan to use with the slippers. Don’t hesitate to contact customer service for guidance, especially if you’re unsure between sizes. Proper fit ensures maximum comfort and durability of your Isotoner slippers, enhancing your overall experience.

Where to Buy and Fit Guide

Isotoner slippers are available at authorized retailers, both online and in-store. Ensure a proper fit by using their detailed size guide and fitting tips provided.

Authorized Retailers and Fit Guides

Isotoner slippers are available at authorized retailers, ensuring authenticity and quality. Popular options include Amazon, Nordstrom, and the official Isotoner website. These retailers often provide detailed fit guides, helping you choose the perfect size. Many offer free shipping, hassle-free returns, and competitive pricing. For the best fit, use their size charts and measuring tips. Seasonal styles and limited editions may have unique sizing, so checking the specific product guide is recommended; Purchasing from authorized sellers guarantees genuine products and reliable customer service, ensuring your Isotoner slippers provide long-lasting comfort and satisfaction.

Online vs. In-Store Fitting Tips

When purchasing Isotoner slippers, consider whether to shop online or in-store for the best fit. Online shoppers should use detailed size charts and customer reviews to guide their choice. Measure your feet accurately at home and refer to the fit guide for optimal sizing. In-store shoppers can try on multiple sizes and styles to ensure comfort and proper fit. Some retailers offer virtual sizing tools or 3D foot scanners for precise measurements. Online buyers may benefit from “try before you buy” options, allowing returns or exchanges if the fit isn’t perfect. Both methods ensure a comfortable and stylish experience with Isotoner slippers.

Care and Maintenance

Proper care ensures long-lasting comfort. Clean Isotoner slippers with a damp cloth, avoiding harsh chemicals. Allow them to air dry to maintain shape and softness over time.

How to Maintain Fit and Comfort Over Time

Regular care is essential to preserve the fit and comfort of Isotoner slippers. Store them in a cool, dry place to prevent stretching or deformation. Avoid exposing them to direct sunlight or extreme heat, as this may cause the material to lose its shape. For cleaning, use a soft cloth dampened with water, gently wiping away dirt without soaking the slippers. Avoid using harsh chemicals or abrasive cleaners, as they can damage the material. Allow the slippers to air dry naturally, reshaping them while damp if needed. Proper maintenance ensures your Isotoner slippers remain comfortable and supportive for years to come.

sos safety guide

Welcome to the SOS Safety Guide, a comprehensive resource designed to help individuals and families prepare for and respond to various emergencies. This guide provides essential strategies for understanding risks, developing safety plans, and staying calm during crises, ensuring you are equipped to handle any situation effectively.

1.1 Overview of the Guide

The SOS Safety Guide is a detailed, user-friendly manual that equips individuals and families with the knowledge and tools needed to navigate emergencies effectively. It covers a wide range of topics, from understanding various types of emergencies to practical steps for preparation, response, and recovery. The guide emphasizes proactive measures, such as creating emergency plans, building survival kits, and securing living spaces. It also addresses critical skills like staying calm during crises, using SOS signals, and performing basic first aid. Additionally, the guide provides insights into long-term recovery, including emotional well-being, financial restoration, and rebuilding safety measures. Designed to be adaptable to different environments and situations, this guide ensures that everyone can be better prepared to face the unexpected with confidence and resilience.

1.2 Importance of Safety Preparedness

Safety preparedness is a critical cornerstone for individuals and families to navigate life’s uncertainties with confidence. Emergencies, whether natural disasters, accidents, or medical crises, can strike without warning, leaving little time for last-minute decisions. Being prepared significantly reduces risks, minimizes damage, and saves lives. It empowers individuals to act decisively, reducing fear and chaos during critical moments. A well-thought-out plan and essential supplies not only provide practical support but also offer peace of mind; Moreover, preparedness fosters resilience, enabling quicker recovery and adaptation after an emergency. By prioritizing safety, individuals can protect their loved ones and assets, ensuring a safer and more secure future. This guide emphasizes the proactive steps needed to build a strong foundation for emergency readiness.

Understanding Emergencies

Understanding Emergencies is crucial for effective preparedness and response. Emergencies vary in nature, impacting individuals and communities differently. Recognizing their types and potential risks enables better planning and safer outcomes, ensuring readiness for any crisis. This section provides insights into the diversity of emergencies, helping you anticipate and manage challenges proactively. By grasping the fundamentals, you can enhance your ability to respond decisively and protect yourself and others during critical situations.

2.1 Types of Emergencies (Natural Disasters, Accidents, Medical)

Emergencies can be broadly categorized into three main types: natural disasters, accidents, and medical emergencies. Natural disasters, such as earthquakes, hurricanes, and floods, are large-scale events caused by environmental factors. Accidents, including car crashes, fires, and workplace incidents, often result from human error or equipment failure. Medical emergencies, like heart attacks, injuries, or sudden illnesses, require immediate attention to prevent severe consequences. Each type demands a unique response, but all share the need for swift action and preparedness. Understanding these categories helps individuals tailor their safety strategies, ensuring they are equipped to handle diverse crisis situations effectively. Recognizing the differences is the first step in building a robust emergency response plan;

2.2 Identifying Potential Risks in Your Environment

Identifying potential risks in your environment is a critical step in emergency preparedness. Start by assessing your surroundings for natural hazards, such as flood zones, earthquake-prone areas, or regions susceptible to wildfires. Additionally, consider man-made risks like nearby industrial sites, highways, or chemical plants. Evaluate your home for structural weaknesses, electrical hazards, and fire risks. Stay informed about local crime rates and potential health hazards. Create a checklist to systematically identify these risks and prioritize them based on likelihood and impact. Understanding your environment’s unique challenges allows you to tailor your safety measures effectively. Regular updates and awareness of changing conditions ensure you remain prepared for any situation. This proactive approach is essential for safeguarding yourself and your loved ones from potential dangers.

Preparing for Emergencies

Preparing for emergencies involves creating a plan, building a kit, and securing your space to ensure safety and readiness. Stay proactive to face challenges confidently.

3.1 Creating an Emergency Plan

Creating an emergency plan is crucial for ensuring everyone knows what to do during a crisis. Start by identifying safe escape routes and designating a meeting point outside your home. Consider different scenarios, such as fires, earthquakes, or floods, and tailor your plan accordingly. Include contact information for emergency services and a trusted neighbor. Assign roles to each family member to ensure responsibilities are clear. Practice the plan regularly to build confidence and efficiency. Customize the plan for household members with special needs. Update it annually or when circumstances change. A well-prepared emergency plan can save lives and reduce panic during critical moments. Make sure all family members understand and agree on the details to ensure everyone’s safety.

3.2 Building an Emergency Kit

Building an emergency kit is a vital step in preparedness, ensuring you have essentials readily available during a crisis. Start with water (at least one gallon per person per day for three days) and non-perishable food. Include a first aid kit, flashlights, batteries, and a battery-powered radio. Add personal items like medications, extra clothing, and important documents (e.g., insurance policies, ID). Don’t forget multipurpose tools, a whistle, and cash in small bills. Sanitation supplies, such as toilet paper and hand sanitizer, are also crucial. Store the kit in a portable, waterproof container and ensure it’s easily accessible. Regularly check expiration dates and update supplies as needed. Customize the kit for your household’s specific needs, such as diapers or pet food. A well-stocked emergency kit can provide comfort and sustain life until help arrives.

3.3 Securing Your Home for Safety

Securing your home is crucial for protecting your family and belongings during emergencies. Start by identifying potential hazards, such as loose outdoor furniture or dead tree branches, and address them. Install sturdy doors, locks, and windows, and consider reinforcing them with impact-resistant materials. Ensure proper ventilation to prevent gas buildup and keep emergency exits clear. Smoke and carbon monoxide detectors should be installed on every level of your home and tested monthly. Store flammable materials like paint or gasoline in secure, well-ventilated areas. Organize emergency exit routes and practice them with all household members. Regularly inspect your home’s structure, especially the roof and foundation, to ensure it can withstand natural disasters. By taking these proactive steps, you can significantly reduce risks and create a safer living environment. Remember, a secure home is your first line of defense in any emergency situation.

3.4 Communication Strategies During Crises

Effective communication is vital during emergencies to ensure safety and coordination. Designate a meeting point and a contact person outside your immediate area for family members to connect if separated. Use reliable communication tools like cell phones with chargers or two-way radios in case of power outages. Practice sending emergency messages and keep important contact information readily accessible. Teach all household members how to call emergency services and use basic communication devices. Regular drills can help ensure everyone understands the communication plan. Additionally, consider special needs, such as translation services or assistive devices for individuals with disabilities. Stay informed through trusted sources like NOAA Weather Radio or official emergency apps. Clear and consistent communication can help prevent confusion and ensure everyone’s safety during a crisis.

Responding to Emergencies

Responding to emergencies requires staying calm, assessing situations quickly, and acting decisively. Use your emergency kit, communicate clearly, and prioritize safety to protect yourself and others effectively.

4.1 Staying Calm and Assessing the Situation

Remaining calm during an emergency is crucial for making clear decisions. Take deep breaths to manage panic and quickly assess your surroundings for potential dangers. Identify safe exits, check for injuries, and gather essential items like your emergency kit. Communicate with others to ensure everyone is accounted for and aware of the situation. Avoid unnecessary risks and prioritize your safety above all else. A calm and rational mindset helps you respond effectively and protect yourself and others during a crisis.

4.2 Using SOS Signals Effectively

Using SOS signals effectively is a critical skill during emergencies. The universal SOS signal, often represented as three short bursts, three long bursts, and three short bursts (e.g., “…—…”), is widely recognized as a distress call. Whether using light, sound, or movement, clarity and consistency are key. For visual signals, use reflective surfaces like mirrors or shiny objects to catch attention. Auditory signals, such as whistles or horns, should be loud and repetitive. Stay visible to rescuers by positioning yourself in open areas. Always maintain a steady rhythm to avoid confusion. Practicing these techniques ensures quick recognition and timely assistance. Remember, the SOS signal is your lifeline in critical situations, so use it wisely and with precision to maximize your chances of being noticed and rescued efficiently.

4;3 Basic First Aid Techniques

Basic first aid techniques are essential for providing immediate care during emergencies. Always prioritize safety by assessing the situation and wearing protective gear if needed. For injuries, stop bleeding by applying direct pressure with a clean cloth or bandage. Elevate the injured limb above heart level to reduce swelling. For burns, cool the affected area with running water for 10–15 minutes. Splint fractures to immobilize the limb and prevent further injury. If a person is unconscious, place them in the recovery position to maintain an open airway. Never move someone with a suspected spinal injury unless absolutely necessary. Stay calm, reassure the injured person, and seek professional medical help as soon as possible. These techniques can significantly improve outcomes until advanced care is available.

4.4 Evacuation Procedures

Evacuation procedures are critical for safely exiting dangerous situations. Always stay calm and follow your emergency plan. Identify at least two escape routes from each location and practice them regularly. Designate a safe meeting point outside for everyone to gather once evacuated. Stay low to the ground if there is smoke, as it reduces exposure to toxic fumes. Never use elevators during an evacuation, as they may malfunction. Assist vulnerable individuals, such as the elderly or those with disabilities, if safe to do so. Once outside, do not re-enter the building for any reason. Follow instructions from authorities and remain at a safe distance until the situation is deemed secure. Remember, evacuation is about preserving life, so act quickly and stay informed to ensure everyone’s safety.

Recovery After Emergencies

Recovery after emergencies is a critical phase focused on restoring stability and normalcy. It involves assessing damage, rebuilding, and seeking support to address both physical and emotional needs. Prioritize health, secure basic necessities, and reconnect with loved ones. Engage with community resources and professionals to rebuild safely. This process strengthens resilience and prepares individuals for future challenges, ensuring long-term safety and well-being.

5.1 Emotional and Psychological Recovery

Emotional and psychological recovery is a vital part of healing after an emergency. The trauma and stress caused by crises can linger, affecting mental health and well-being. It is essential to acknowledge these feelings and seek support from loved ones, support groups, or mental health professionals. Engaging in self-care activities, such as mindfulness, meditation, or creative expression, can help restore emotional balance. Open communication and sharing experiences with others who understand can foster a sense of community and reduce isolation. Professional counseling or therapy may also be necessary to address conditions like anxiety, depression, or PTSD. Remember, healing is a gradual process, and patience with oneself is crucial. Prioritizing emotional well-being ensures a stronger foundation for overall recovery and resilience in the face of future challenges.

5.2 Financial Recovery and Insurance Claims

Financial recovery after an emergency is crucial for rebuilding stability. Start by assessing damages and reviewing insurance policies to understand coverage and claim processes. Document all losses with photos and receipts to support your claims. Contact your insurance provider promptly to initiate the process and avoid delays. Government assistance programs may also be available, such as grants or low-interest loans, to aid in recovery. Budgeting and prioritizing expenses can help manage financial strain. Seeking advice from a financial counselor can provide guidance on rebuilding savings and managing debt. Remember, financial recovery takes time, but proactive steps can ease the burden and restore economic stability.

5.3 Rebuilding and Reinforcing Safety Measures

After an emergency, rebuilding and reinforcing safety measures is essential to prevent future risks. Start by assessing damage to your property and identifying areas that need repair or upgrades. Strengthening structural components, such as walls or roofs, can improve resilience against natural disasters. Install safety devices like smoke detectors, fire extinguishers, and security systems to enhance protection. Regular maintenance of these systems ensures they function effectively. Additionally, integrate smart technology, such as flood sensors or earthquake alerts, to receive early warnings. Review and update your emergency plan to address any vulnerabilities exposed during the crisis. By taking proactive steps, you can create a safer and more secure environment for the future.

6.1 Recap of Key Safety Measures

6.2 Final Thoughts on Preparedness

Preparedness is a continuous effort that empowers individuals to face emergencies with confidence and clarity. By staying informed, creating robust safety plans, and maintaining emergency kits, you significantly reduce the risk of panic and harm. The SOS Safety Guide underscores the importance of proactive measures, such as securing your home, mastering basic first aid, and understanding evacuation procedures. Preparedness also extends to emotional resilience, enabling you to support loved ones during crises. Remember, safety is a shared responsibility—stay vigilant, adapt your strategies as needed, and prioritize ongoing learning. By embracing these principles, you not only protect yourself but also contribute to a safer community. Always stay ready, because preparedness is the cornerstone of survival and recovery in any situation.

many pages in a travel guide

A travel guide’s page count significantly influences its effectiveness in providing detailed‚ organized information to travelers‚ balancing comprehensiveness with readability to enhance the travel experience for both seasoned explorers and first-time visitors․

1․1 What is a Travel Guide?

A travel guide is a comprehensive resource designed to assist travelers in planning and navigating their journeys․ It typically includes detailed descriptions of destinations‚ landmarks‚ and attractions‚ along with practical advice on accommodations‚ dining‚ transportation‚ and activities․ Travel guides often incorporate maps‚ photographs‚ and insider tips to enhance the reader’s experience․ They may focus on specific types of travel‚ such as budget tourism‚ luxury vacations‚ or adventure trips‚ catering to diverse preferences and needs․ By providing valuable insights and recommendations‚ travel guides serve as indispensable companions for both seasoned explorers and first-time travelers‚ helping them make informed decisions and maximize their enjoyment of new places․ Whether in print or digital format‚ these guides aim to simplify travel planning and enrich the overall experience‚ making them an essential tool for anyone venturing into the unknown․

1․2 Why Page Count Matters in a Travel Guide

The page count of a travel guide plays a crucial role in determining its effectiveness․ A guide with too few pages may lack essential details‚ while an overly lengthy one can overwhelm readers․ The ideal page count strikes a balance between providing comprehensive information and maintaining readability․ It ensures that travelers can easily navigate the content without feeling burdened․ Additionally‚ the number of pages influences the guide’s portability; a compact guide is more convenient for on-the-go use․ The page count also reflects the depth of coverage‚ with more pages allowing for detailed insights into destinations‚ cultures‚ and practical tips․ Ultimately‚ the right number of pages enhances the travel experience by offering a wealth of information in an accessible format‚ making it a valuable resource for planning and exploration․ By optimizing page count‚ a travel guide can cater to diverse traveler needs while remaining user-friendly and informative․

Benefits of a Multi-Page Travel Guide

A multi-page travel guide offers comprehensive coverage‚ enhanced readability‚ and better organization of information‚ making it easier for travelers to plan and navigate their journeys effectively while exploring new destinations․

2․1 Comprehensive Coverage of Destinations

A multi-page travel guide allows for extensive exploration of various destinations‚ providing detailed descriptions of landmarks‚ attractions‚ and hidden gems․ With ample space‚ it can cover multiple cities‚ regions‚ or even countries‚ ensuring travelers gain a thorough understanding of each area․ This depth enables readers to plan itineraries more effectively‚ discovering not just popular spots but also lesser-known locales that offer unique experiences․ Maps‚ directories‚ and categorized listings further enhance the guide’s utility‚ making it easier for travelers to navigate unfamiliar territories․ The comprehensive coverage ensures that no aspect of a destination is overlooked‚ from historical sites to modern entertainment options‚ catering to diverse interests and preferences․ This level of detail transforms a travel guide into an indispensable resource for anyone seeking to explore new places with confidence and curiosity․

2․2 In-Depth Insights into Local Cultures

A multi-page travel guide offers the space to delve deeply into the cultural fabric of destinations‚ providing readers with a rich understanding of local traditions‚ customs‚ and history․ With ample pages‚ the guide can explore the nuances of regional dialects‚ folklore‚ and cultural practices‚ enabling travelers to appreciate the unique identity of each place․ Detailed sections on local cuisine‚ festivals‚ and arts and crafts further enrich the cultural immersion․ Additionally‚ the guide can include practical advice on etiquette‚ helping travelers navigate cultural differences with respect and sensitivity․ By dedicating pages to these aspects‚ the guide not only educates but also encourages travelers to engage meaningfully with the communities they visit․ This depth of cultural insight transforms a travel guide into more than just a planning tool—it becomes a bridge to understanding and connecting with the soul of a destination․

2․3 Detailed Practical Information for Travelers

A multi-page travel guide provides ample space to include detailed practical information essential for travelers‚ such as transportation options‚ accommodation recommendations‚ and dining guides․ With more pages‚ the guide can offer comprehensive maps‚ highlighting key landmarks‚ public transit routes‚ and walking trails․ Additionally‚ it can feature sections dedicated to safety tips‚ emergency contacts‚ and language phrases‚ ensuring travelers are well-prepared․ Detailed itineraries and budget planners further assist in organizing trips effectively․ The inclusion of real-world tips‚ such as the best times to visit attractions or how to navigate local customs‚ enhances the traveler’s experience․ By dedicating pages to these practical aspects‚ the guide becomes an indispensable resource‚ helping travelers make informed decisions and navigate their journey seamlessly․ This level of detail ensures that travelers feel confident and equipped‚ whether they’re exploring a familiar city or venturing into an unfamiliar region․

2․4 Enhanced Reader Engagement

A multi-page travel guide offers the opportunity to captivate readers through engaging storytelling‚ vivid descriptions‚ and immersive content․ With more pages‚ the guide can incorporate personal anecdotes‚ traveler testimonials‚ and intriguing local legends‚ making the content more relatable and interesting․ High-quality visuals‚ such as photographs‚ illustrations‚ and infographics‚ can be spread across multiple pages‚ ensuring they are displayed prominently and enhance the reading experience․ Additionally‚ a longer guide allows for the inclusion of interactive elements like quizzes‚ checklists‚ or planning sections‚ which encourage active participation from readers․ The ability to delve deeper into fascinating aspects of a destination fosters a stronger emotional connection‚ turning the guide into a cherished companion rather than a mere reference․ By combining informative content with engaging narratives and visuals‚ a multi-page travel guide keeps readers captivated‚ inspiring them to explore new places with enthusiasm and curiosity;

Challenges of a Multi-Page Travel Guide

Creating and managing a multi-page travel guide presents challenges like information overload‚ portability issues‚ and the need for frequent updates to maintain accuracy and relevance for travelers․

3․1 Information Overload

One of the primary challenges of a multi-page travel guide is the risk of information overload․ With so many pages dedicated to various destinations‚ attractions‚ and tips‚ readers can become overwhelmed by the sheer volume of content․ This can lead to difficulty in identifying the most relevant or useful information‚ potentially diminishing the guide’s practical value․ Additionally‚ overly detailed sections may deter readers who prefer concise‚ easy-to-digest information․ To mitigate this‚ creators must strike a balance between providing comprehensive details and maintaining clarity․ Organizing content into clear categories‚ using visual aids like maps or infographics‚ and prioritizing essential information can help prevent overload․ Moreover‚ incorporating digital tools‚ such as searchable indexes or hyperlinks‚ can enhance usability․ Ultimately‚ managing information effectively is crucial to ensuring the guide remains a helpful resource rather than a daunting one․

3․2 Portability Issues

A multi-page travel guide often presents portability challenges‚ particularly for travelers who prefer to carry lightweight and compact resources․ The increased number of pages can result in a bulky book that is cumbersome to transport‚ especially during extended trips or for travelers who prefer to move freely without extra weight․ This can be frustrating for individuals who value convenience and ease of access to information on the go․ Additionally‚ a thick guide may not fit easily into backpacks‚ purses‚ or pockets‚ further complicating its practicality․ To address this‚ many travelers opt for digital versions of travel guides‚ which eliminate the physical bulk while retaining all the necessary information․ However‚ for those who prefer physical guides‚ careful editing and concise content can help reduce the page count without sacrificing essential details‚ making the guide more portable and user-friendly․ Balancing comprehensiveness with portability is key to creating an ideal travel companion․

3․3 Maintenance and Updates

Maintaining and updating a multi-page travel guide can be a significant challenge‚ as the sheer volume of content requires frequent revisions to keep information accurate and relevant․ With more pages comes a greater responsibility to ensure that every detail‚ from attraction opening hours to accommodation listings‚ is up-to-date․ This process can be time-consuming and resource-intensive‚ as researchers and writers must continuously verify facts and gather new data․ Additionally‚ the complexity of updating a lengthy guide can lead to delays in publication‚ potentially rendering the guide obsolete before it even reaches readers․ For travelers relying on the guide‚ outdated information can be frustrating and even misleading․ Publishers must therefore adopt efficient systems for regular updates‚ possibly incorporating digital supplements or frequent reprints‚ to ensure the guide remains a reliable resource․ Balancing thoroughness with timeliness is crucial for maintaining trust and usability․

Best Practices for Creating a Multi-Page Travel Guide

Creating a multi-page travel guide requires a strategic approach‚ balancing detailed insights with clear organization․ Prioritize high-quality visuals‚ concise language‚ and practical tips to engage readers while avoiding overwhelm․ Regular updates ensure relevance and accuracy‚ maintaining trust and usability for travelers seeking reliable information․ Incorporate reader-friendly formats like maps‚ itineraries‚ and highlighted tips to enhance accessibility and appeal․ By focusing on these elements‚ a travel guide becomes an indispensable resource for exploring new destinations;

4․1 Organization and Structure

A well-structured travel guide is essential for readability and usability․ Start with a clear table of contents‚ dividing the guide into logical sections such as destinations‚ activities‚ and practical tips․ Use headings and subheadings to break up content‚ ensuring easy navigation․ Incorporate bullet points and numbered lists for quick reference‚ especially for itineraries or top recommendations․ Maps and visuals should be strategically placed to complement text without overwhelming the reader․ Consistency in formatting‚ such as using bold for key terms or icons for categories‚ enhances clarity․ Additionally‚ consider including an index or glossary for quick access to specific information․ By organizing content thoughtfully‚ the guide becomes a user-friendly tool that caters to diverse traveler needs‚ from planning to execution․ Proper structure ensures that even in a multi-page guide‚ information remains accessible and engaging․

4․2 Use of High-Quality Visuals

High-quality visuals are crucial for enhancing the appeal and utility of a multi-page travel guide․ Vibrant images‚ detailed maps‚ and infographics captivate readers‚ making the guide more engaging and easier to digest․ Photos of landmarks‚ local cuisine‚ and cultural events bring destinations to life‚ inspiring travelers and helping them visualize their trips․ Maps are indispensable for navigation‚ while infographics can present information like weather charts‚ transportation options‚ or festival calendars in an accessible format․ Consistency in visual style and placement ensures a polished look‚ while captions provide context․ Avoid overcrowding pages with visuals; instead‚ use them to complement text and break up long sections․ High-resolution images and clear graphics ensure readability in both print and digital formats․ By integrating visuals thoughtfully‚ a travel guide becomes not only informative but also a source of inspiration‚ making it a valuable resource for planning and exploring․

4․3 Balancing Detail and Brevity

Balancing detail and brevity is essential when creating a multi-page travel guide․ While providing comprehensive information is crucial‚ overwhelming readers with excessive detail can hinder usability․ The key is to present essential facts clearly and concisely‚ ensuring the guide remains informative yet easy to navigate․ Prioritize the most relevant information for each section‚ such as must-visit attractions‚ practical tips‚ and local insights‚ while avoiding unnecessary minutiae․ Use bullet points‚ summaries‚ and clear headings to organize content effectively․ This approach helps readers quickly find what they need without feeling overwhelmed․ Additionally‚ ensuring that each page focuses on a specific theme or destination prevents clutter and enhances readability․ By striking this balance‚ a travel guide becomes both a valuable resource and an enjoyable read‚ catering to diverse traveler preferences and needs․

The page count of a travel guide significantly impacts its effectiveness‚ requiring a balance between detail and brevity to ensure it remains both informative and accessible‚ enhancing the travel experience․

5․1 Recap of Key Points

5․2 Final Thoughts on the Importance of Page Count

The page count of a travel guide is a critical factor that directly impacts its usefulness and appeal․ While more pages allow for detailed coverage of destinations‚ cultures‚ and practical tips‚ they also risk overwhelming readers․ Striking a balance is essential to ensure the guide remains both informative and portable․ Ultimately‚ the page count reflects the guide’s ability to cater to diverse traveler needs‚ from adventurers seeking in-depth insights to those preferring concise‚ easy-to-carry resources․ By thoughtfully curating content and organizing it well‚ a multi-page travel guide can enhance the travel experience‚ making it a valuable companion for explorers worldwide․ The importance of page count lies in its role as a tool to bridge information and accessibility‚ ensuring travelers can make the most of their journeys with confidence and ease․

defy tv guide

Welcome to the Defy TV Guide, your ultimate resource for exploring the exciting world of Defy TV. This guide provides detailed listings, exclusive highlights, and insider tips to enhance your viewing experience.

1.1 Overview of Defy TV

Defy TV is a dynamic platform offering a wide range of unique and diverse content tailored to captivate modern audiences. Known for its bold and unconventional approach, Defy TV provides a mix of entertainment, documentaries, and original series that challenge traditional norms. The platform is designed to appeal to viewers seeking fresh perspectives and innovative storytelling. With a focus on younger demographics, Defy TV has become a hub for those who embrace individuality and rebel against the status quo. Its programming often features real-life stories, cutting-edge documentaries, and engaging shows that spark curiosity and inspire change. Over time, Defy TV has grown in popularity, becoming a go-to destination for viewers looking for content that stands out from the mainstream. Available on both traditional TV channels and streaming platforms, Defy TV continues to redefine entertainment by pushing boundaries and amplifying bold new voices.

1.2 Importance of a TV Guide

A TV guide is an essential tool for navigating the vast array of content available on Defy TV. It serves as a comprehensive resource, helping viewers discover new shows, track schedules, and plan their viewing experience. By providing detailed listings and descriptions, a TV guide ensures that audiences never miss out on their favorite programs or special events. Additionally, it highlights unique and engaging content, making it easier for viewers to explore diverse genres and themes. For new viewers, a TV guide acts as an introduction to Defy TV’s offerings, while for loyal fans, it serves as a trusted companion to stay updated on the latest episodes and series. Ultimately, a TV guide enhances the overall viewing experience by offering convenience, clarity, and inspiration for selecting compelling content.

History of Defy TV

Defy TV emerged as a groundbreaking platform, revolutionizing entertainment with its unique approach to storytelling. From its inception to its rise as a cultural phenomenon, Defy TV has captivated audiences globally.

2.1 Early Days of Defy TV

Defy TV first emerged in 2010 as a small, innovative network aiming to challenge traditional media norms. Founded by a group of visionary creators, it focused on delivering bold, unconventional content that resonated with a younger, diverse audience. Initially operating with limited resources, Defy TV quickly gained attention for its raw, unfiltered storytelling. The network’s early lineup featured experimental shows that pushed boundaries, blending genres and exploring taboo topics. Despite facing skepticism, Defy TV built a loyal following by offering something fresh in a saturated market. This period laid the groundwork for its future success, establishing it as a platform willing to take risks and amplify underrepresented voices. By 2015, Defy TV had expanded its reach, embracing digital streaming to connect with a global audience. Its early days were marked by resilience, creativity, and a commitment to redefining entertainment.

2.2 Evolution of Defy TV Over the Years

Over the years, Defy TV has undergone significant transformations, evolving from a niche network to a prominent player in modern entertainment. By 2015, it had expanded its programming to include a mix of scripted series, reality shows, and documentaries, appealing to a broader demographic. The introduction of high-production-value shows like “Breaking the Mold” in 2017 marked a turning point, earning critical acclaim and attracting larger audiences. Defy TV also embraced digital innovation, launching its own streaming platform in 2018, which allowed for on-demand access to its content. This shift enabled the network to reach global viewers and experiment with interactive formats. Today, Defy TV is known for its diverse content, including original films and international collaborations. Its evolution reflects a commitment to staying ahead of industry trends while maintaining its core mission of challenging norms and celebrating individuality. This growth has solidified Defy TV’s position as a leader in contemporary media.

Popular Defy TV Shows

Defy TV offers a diverse lineup of engaging shows that captivate audiences. From the groundbreaking series “Breaking the Mold” to the thought-provoking “Rebel Voices,” these programs showcase unique storytelling and cultural relevance, inspiring viewers worldwide.

3.1 “Breaking the Mold”

“Breaking the Mold” is a groundbreaking series that redefines storytelling by blending genres and pushing creative boundaries. This show challenges traditional narratives, offering a fresh perspective on identity, society, and personal growth. With its dynamic characters and innovative plot twists, it has captivated audiences and set a new standard for original content. The series explores themes of self-discovery and societal expectations, resonating deeply with viewers seeking relatable yet unconventional stories. Its success has solidified its place as one of Defy TV’s flagship programs, earning critical acclaim and fostering a loyal fan base. By daring to be different, “Breaking the Mold” exemplifies Defy TV’s commitment to innovative and impactful entertainment.

3.2 “Rebel Voices”

“Rebel Voices” is a compelling series that amplifies the stories of individuals and communities often overlooked by mainstream media. This show is known for its unapologetic storytelling, tackling real-life issues with raw honesty and emotional depth. By giving a platform to diverse voices, it challenges societal norms and encourages viewers to question their assumptions. The series features a mix of fictional narratives and real-life testimonials, creating a powerful blend of entertainment and social commentary. Its bold approach to storytelling has made it a fan favorite, particularly among audiences seeking authentic and thought-provoking content. “Rebel Voices” not only entertains but also inspires, fostering a sense of connection and understanding among its viewers. With its fearless narrative style, the show embodies the spirit of Defy TV, proving that television can be both impactful and transformative.

3.3 “Beyond the Ordinary”

“Beyond the Ordinary” is a captivating series that delves into the extraordinary and the unknown, pushing the boundaries of conventional storytelling. This show explores themes of science fiction, fantasy, and supernatural phenomena, often blending genres to create a unique viewing experience. Each episode presents a fresh narrative, featuring characters who challenge the status quo and embark on journeys that redefine reality. The series is known for its visually stunning production and thought-provoking plotlines, which keep audiences engaged and curious. By venturing into uncharted territories, “Beyond the Ordinary” encourages viewers to question what they believe and embrace the possibilities of the unseen. This show has become a fan favorite, particularly among those who enjoy imaginative and unconventional storytelling. With its bold and innovative approach, “Beyond the Ordinary” exemplifies Defy TV’s commitment to offering content that inspires and intrigues.

Themes in Defy TV

Defy TV’s themes are central to its storytelling, pushing boundaries and sparking conversations. The network explores complex ideas, encouraging viewers to rethink societal norms, embrace individuality, and find strength in adversity, inspiring a deeper connection with its audience.

4.1 Challenging Social Norms

Defy TV is renowned for its bold approach to challenging social norms, often tackling controversial topics head-on. Through its programming, the network encourages viewers to question established societal standards and embrace diverse perspectives. Shows on Defy TV frequently explore themes such as gender roles, racial stereotypes, and cultural expectations, presenting them in a way that sparks meaningful conversations. By addressing these issues, the platform not only entertains but also educates, fostering a more inclusive and open-minded audience. This commitment to challenging the status quo has become a hallmark of Defy TV’s identity, setting it apart from traditional programming and resonating deeply with viewers seeking fresh, thought-provoking content. The network’s willingness to confront tough subjects has made it a leader in promoting social change through storytelling.

4.2 Embracing Individuality

At the heart of Defy TV’s programming lies a strong emphasis on embracing individuality. The network celebrates unique personalities, diverse identities, and unconventional lifestyles, offering a platform for voices that often go unheard. Through its shows, Defy TV highlights the beauty of self-expression and the importance of standing out in a world that frequently pressures people to conform. Characters and stories are crafted to inspire viewers to embrace their true selves, whether through bold fashion choices, non-traditional careers, or unconventional relationships. This focus on individuality not only resonates with audiences seeking authenticity but also fosters a sense of community among those who feel misunderstood. By championing personal freedom and creativity, Defy TV has become a beacon for those who reject the ordinary and embrace what makes them different. This commitment to individuality is a cornerstone of the network’s appeal and a key factor in its growing popularity.

4.3 Overcoming Adversity

Defy TV consistently showcases stories of resilience and triumph, highlighting individuals who rise above challenges to achieve their goals. The network’s programming often features characters facing personal, professional, or societal obstacles, demonstrating how determination and perseverance can lead to success. Whether it’s overcoming discrimination, battling personal demons, or defying societal expectations, Defy TV’s narratives inspire viewers to embrace their struggles as opportunities for growth. The shows emphasize the importance of adaptability, courage, and support systems in navigating adversity. By presenting real-life and fictional accounts of overcoming hardships, Defy TV fosters a sense of hope and empowerment among its audience. This theme resonates deeply, encouraging viewers to confront their own challenges with confidence and resilience. Through these compelling stories, Defy TV not only entertains but also motivates its audience to strive for a better future, no matter the obstacles they may face.

The Impact of Defy TV

Defy TV has significantly influenced modern entertainment, shaping perceptions and sparking meaningful conversations. Its innovative approach has set trends, redefined storytelling, and become a cultural phenomenon, leaving a lasting mark on audiences worldwide;

5.1 Cultural Significance

Defy TV has carved a unique space in popular culture by challenging conventional narratives and embracing diverse storytelling. Its shows often reflect real-world issues, fostering empathy and understanding among viewers. By amplifying underrepresented voices, Defy TV has become a beacon for progressive storytelling, inspiring conversations about identity, society, and change. The platform’s commitment to authenticity has resonated deeply, making it a cultural touchstone for audiences seeking fresh perspectives. Defy TV’s influence extends beyond entertainment, contributing to broader societal shifts in how stories are told and received. Its ability to merge entertainment with social commentary has redefined modern television, leaving an indelible mark on the media landscape.

5.2 Audience Reception

Defy TV has garnered a diverse and passionate audience, with viewers praising its bold and unconventional approach to storytelling. The platform’s ability to connect with a wide range of demographics has contributed to its growing popularity. Many fans appreciate how Defy TV pushes boundaries, offering fresh perspectives on traditional narratives. The shows often spark lively discussions on social media, creating a sense of community among viewers. While some critics argue that the content can be polarizing, the majority of the audience celebrates its originality and willingness to tackle taboo subjects. Defy TV’s unique voice has resonated particularly with younger audiences, who appreciate its authenticity and relatability. As a result, the platform has built a loyal fanbase, with many viewers tuning in eagerly for new episodes and specials. This strong audience reception has solidified Defy TV’s reputation as a trailblazer in modern television.

5.3 Influence on Other Media

Defy TV has had a profound impact on the media landscape, inspiring other networks and streaming platforms to adopt bold and innovative approaches to content creation. Its emphasis on unconventional storytelling and diverse narratives has encouraged competitors to experiment with similar formats, leading to a wave of fresh, boundary-pushing shows across the industry. Additionally, Defy TV’s success has prompted traditional networks to rethink their programming strategies, incorporating more niche genres and edgy themes to attract younger, more dynamic audiences. The platform’s influence extends beyond television, with its unique style and tone being referenced in films, podcasts, and even social media trends. By challenging traditional norms and embracing originality, Defy TV has become a benchmark for creativity in modern media, inspiring a new generation of content creators to push the limits of storytelling and engage audiences in entirely new ways.

How to Watch Defy TV

Defy TV offers multiple ways to enjoy its content, including traditional TV channels, streaming platforms, and mobile apps, ensuring accessibility and convenience for all viewers.

6.1 Traditional TV Channels

Defy TV is widely available through traditional TV channels, making it accessible to a broad audience. Viewers can tune in via cable or satellite providers, ensuring high-quality broadcasts and reliable access. Many providers include Defy TV in their standard packages, while others offer it as part of premium bundles. With traditional TV, audiences can enjoy live programming, including popular shows and exclusive events, without the need for internet connectivity. This method is particularly appealing to those who prefer a seamless, ad-free viewing experience. Additionally, traditional TV channels often provide HD quality, enhancing the overall entertainment experience. For those who value simplicity and consistency, watching Defy TV through traditional channels remains a top choice. Check your local listings for channel numbers and scheduling details to stay updated on your favorite shows.

6.2 Streaming Platforms

Defy TV is also accessible through various streaming platforms, offering viewers the flexibility to watch their favorite shows anytime, anywhere. Popular platforms like Roku, Amazon Fire TV, and Google Chromecast support Defy TV, ensuring wide compatibility. Streaming allows for on-demand access to a vast library of content, including current and past episodes of popular series. Additionally, streaming platforms provide personalized recommendations based on viewing habits, enhancing the overall experience. With features like HD streaming quality and the ability to create watchlists, streaming Defy TV has never been more convenient. Many platforms also offer free trials or subscription options, making it easy for new viewers to explore the channel. For those who prefer modern, flexible viewing options, streaming Defy TV is an excellent choice. It’s a great way to stay connected to your favorite shows while enjoying the freedom of on-demand entertainment.

6.3 Tips for Getting the Most Out of Defy TV

To maximize your Defy TV experience, consider a few strategic tips. First, explore the variety of genres offered, from dramas to documentaries, to discover new favorites. Creating a watchlist can help organize your viewing schedule and ensure you never miss an episode. Additionally, enabling notifications for new episodes or exclusive content can keep you updated. Engaging with Defy TV’s online community can enhance your experience, offering discussions and insights. For streaming users, adjusting video quality settings can optimize performance based on your internet connection. Finally, taking advantage of behind-the-scenes content and interviews available on Defy TV’s website adds depth to your viewing experience. By implementing these tips, you can fully immerse yourself in the world of Defy TV and enjoy a more fulfilling and personalized entertainment journey.

7.1 Final Thoughts

In final thoughts, the Defy TV Guide has proven to be an indispensable tool for viewers seeking to navigate the vibrant and dynamic world of Defy TV. By offering comprehensive listings, insightful commentary, and expert recommendations, it empowers audiences to make informed choices about their viewing experiences. The guide not only highlights the diversity of Defy TV’s programming but also underscores its cultural significance and the ways it challenges conventional storytelling. Whether you’re a longtime fan or a new viewer, the Defy TV Guide ensures you stay connected to the shows and themes that define this innovative network. As Defy TV continues to evolve, this guide remains a trusted companion, helping you uncover new favorites and deepen your appreciation for its groundbreaking content.

7.2 The Future of Defy TV

The future of Defy TV is poised for exciting growth and innovation. As the network continues to push boundaries, it is expected to expand its lineup with even more daring and original content. Defy TV is likely to embrace emerging technologies, such as AI-driven recommendations and interactive storytelling, to enhance viewer engagement. The integration of virtual and augmented reality could also redefine how audiences experience their favorite shows. Additionally, Defy TV may further diversify its platforms, offering more exclusive content on streaming services while maintaining its strong presence on traditional TV. With a focus on challenging social norms and celebrating individuality, Defy TV is set to remain a leader in groundbreaking entertainment. The Defy TV Guide will continue to be an essential resource, helping fans navigate and appreciate the network’s evolving offerings. As Defy TV looks ahead, its commitment to innovation and cultural relevance ensures it will stay at the forefront of modern media.