
Michigan’s unique geography, surrounded by the Great Lakes, creates a diverse habitat for birds. Its location makes it a crossroads for migratory birds, offering a rich birdwatching experience.
1.1. Overview of Michigan’s Biodiversity
Michigan’s biodiversity is remarkable, with its diverse landscapes supporting a wide variety of bird species. The state’s strategic location between the Great Lakes and its mix of forests, wetlands, and grasslands create habitats for over 400 bird species. This biodiversity is enhanced by its position along major migratory routes, making it a critical stopover for birds traveling between breeding and wintering grounds. The Upper and Lower Peninsulas differ in ecosystems, further enriching the state’s avifauna. From waterfowl to songbirds, Michigan’s habitats sustain both resident and migratory species, showcasing a vibrant ecological balance that attracts birders and nature enthusiasts alike. Conservation efforts are vital to protecting this rich biodiversity for future generations.
1.2. Importance of Birdwatching in Michigan
Birdwatching holds significant ecological, economic, and educational value in Michigan. It fosters a deeper connection with nature, promoting conservation efforts and environmental stewardship. The hobby supports local economies through tourism, creating jobs in eco-tourism and related industries. Birdwatching also serves as an educational tool, inspiring scientific curiosity and awareness about Michigan’s diverse avifauna. Additionally, it plays a crucial role in monitoring bird populations, aiding in conservation initiatives. For many, it is a source of recreation and mental well-being, encouraging outdoor exploration. By engaging residents and visitors alike, birdwatching contributes to the preservation of Michigan’s natural heritage for future generations.

Key Characteristics of Michigan’s Birds
Michigan’s birds showcase remarkable diversity, with varying plumage, songs, and behaviors. Their adaptability to different habitats highlights their unique ecological roles and survival strategies.
2.1. Physical Traits and Plumage
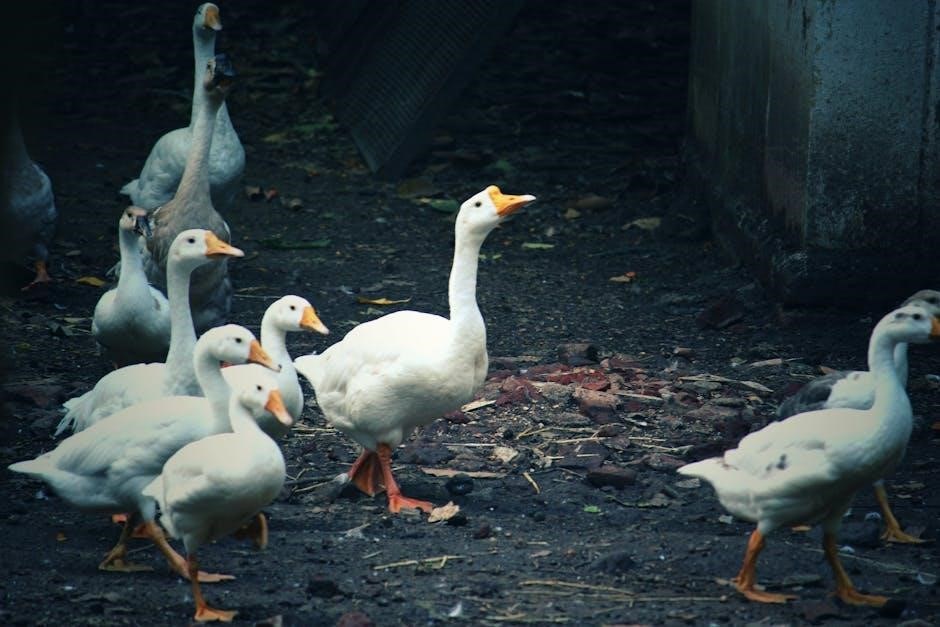
Mirror the diversity of Michigan’s birdlife through their physical traits and plumage. Birds vary greatly in size and shape, from the tiny hummingbird to the majestic eagle. Plumage patterns, colors, and textures serve as key identifiers, often reflecting seasonal changes. Many species exhibit vibrant hues during breeding seasons, while others display more subdued tones for camouflage. Beak shapes and sizes also vary, adapted to specific diets, such as the broad, flat bill of a duck or the sharp, hooked beak of a raptor. These physical characteristics not only aid in identification but also reveal adaptations to their environment and ecological roles, making them fascinating subjects for study and observation.
2.2. Behavioral Patterns and Migration
Birds in Michigan exhibit varied behavioral patterns, influenced by seasons and habitats. Many species migrate, following established flyways like the Mississippi and Atlantic routes. Spring migration brings bursts of activity as birds return to breeding grounds, while fall migration sees flocks traveling south. Some birds, like waterfowl, rely on wetlands for resting and feeding during these journeys. Behavioral adaptations, such as flocking and nocturnal travel, enhance survival during migration. Resident birds, like chickadees, adapt to winter by altering diets and social behaviors. Understanding these patterns aids in predicting sightings and appreciating the dynamic nature of Michigan’s avifauna.
2.3. Habitat Preferences
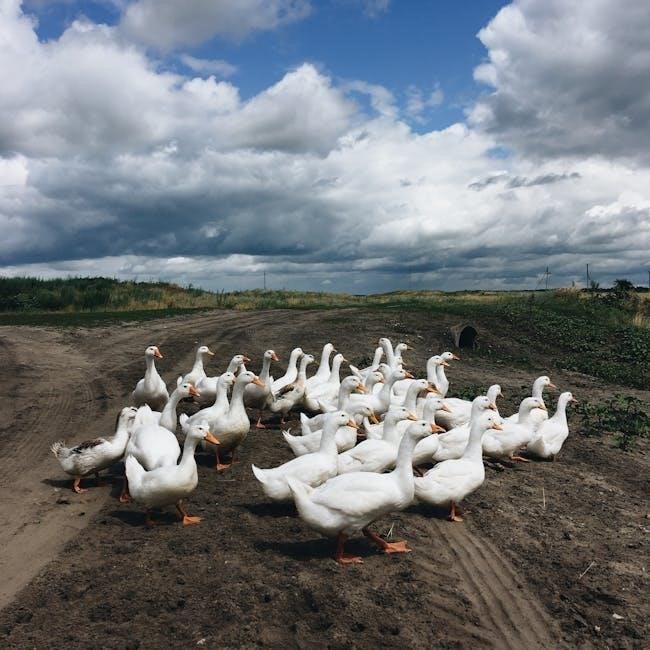
Michigan’s birds occupy a wide range of habitats, from dense forests to open grasslands and wetlands. Forest-dwelling species like woodpeckers and warblers thrive in the state’s abundant woodlands. Wetlands attract herons, egrets, and waterfowl, while grasslands are home to sparrows and meadowlarks. Many birds also adapt to urban and suburban environments, with species like cardinals and finches frequenting backyard feeders. The diversity of habitats ensures that Michigan supports a broad variety of birdlife, catering to different ecological needs. Understanding these preferences aids in identifying species and appreciating their roles within specific ecosystems.

Regional Bird Distribution in Michigan
Michigan’s diverse geography supports varied bird populations across its regions. From forests to wetlands, each area attracts unique species, shaped by climate, habitat, and seasonal changes.
3.1. Birds of the Upper Peninsula
The Upper Peninsula (UP) of Michigan is a haven for bird enthusiasts, boasting a diverse range of species due to its vast forests, wetlands, and remote landscapes. The dense boreal forests attract birds like the Black-backed Woodpecker and Boreal Chickadee, while the open areas are home to species such as the Sandhill Crane and Sharp-tailed Grouse. The UP is also a critical stopover for migratory birds, including warblers and raptors. During spring and fall migrations, birders can spot rare visitors like the Eurasian Wigeon or Ross’s Goose. The region’s unique combination of habitats supports over 300 bird species, making it a must-visit destination for any serious birder.
3.2. Birds of the Lower Peninsula
The Lower Peninsula of Michigan is home to a wide variety of bird species, thanks to its diverse landscapes, including forests, grasslands, and wetlands. This region attracts both migratory and resident birds. Year-round residents like the American Robin and Downy Woodpecker are common, while migratory species such as the Ruby-throated Hummingbird and warblers pass through during spring and fall. Urban areas and backyard feeders also support species like the Northern Cardinal and Blue Jay. The mix of habitats ensures a dynamic birding experience, with opportunities to spot species adapted to deciduous forests, open fields, and even urban environments. This diversity makes the Lower Peninsula a key destination for birdwatchers in Michigan.
3.3. Birds of the Great Lakes Shorelines
Michigan’s Great Lakes shorelines are a haven for waterfowl, gulls, and migratory birds. Species like the Common Loon and Piping Plover thrive in these coastal areas. The shoreline’s mix of sandy beaches, rocky edges, and wetlands supports a variety of birdlife. During migration, the Great Lakes act as a critical stopover for birds traveling between breeding and wintering grounds. Rare species, such as the Black Scoter, can be spotted during these periods. The shoreline’s unique ecosystems attract both residents and visitors, making it a focal point for birding enthusiasts. Conservation efforts are essential to protect these habitats and ensure the continued diversity of avifauna in the region.
3.4. Birds of the Michigan Wetlands
Michigan’s wetlands are vital habitats for numerous bird species, providing breeding, feeding, and migratory stopover points. These areas are home to herons, egrets, and waterfowl like ducks and geese. The wetlands also support shorebirds such as sandpipers and plovers during migration. Birds like the American Bittern and Least Bittern thrive in marshy environments, while ospreys and bald eagles frequent wetland edges. Wetlands are critical for species recovery, as seen with the Great Egret and Trumpeter Swan. Birders should use binoculars to spot these species without disturbing habitats. Visiting during spring and fall migrations offers prime opportunities to observe a wide variety of wetland birds.

Seasonal Variation in Bird Populations
Michigan’s bird populations vary significantly by season, influenced by migration patterns and habitat availability. This diversity creates dynamic birdwatching opportunities throughout the year.
4.1. Spring Migration
Michigan’s spring migration typically occurs from late March to early June, with peak activity in April and May. During this period, numerous bird species return from their southern wintering grounds to breed in the state’s diverse habitats. Warblers, tanagers, and orioles are among the most colorful migrants, while raptors like hawks and eagles soar overhead. Key stopover locations, such as the Upper Peninsula and Lake Michigan shorelines, provide critical resting and feeding areas. Wetlands and forests are particularly vital for waterfowl and songbirds. This migration is essential for replenishing breeding populations and offers exceptional opportunities for birders to observe a wide variety of species in their vibrant spring plumage.
4.2. Summer Breeding Season
Summer in Michigan marks the peak breeding season for many bird species. Warm weather and abundant food sources create ideal conditions for nesting and raising young. Birds exhibit vibrant plumage and territorial behaviors, with males often displaying elaborate courtship rituals. Species like the American Robin, Red-winged Blackbird, and Yellow Warbler are particularly active, building nests in diverse habitats. Wetlands, forests, and backyards become hubs of activity as birds focus on reproduction. This period is crucial for population growth, with many species raising multiple broods. Birders can observe fledglings learning to fly and forage, making summer a rewarding time for observing avian life cycles and behaviors;
4.3. Fall Migration
Fall migration in Michigan is a spectacular season for birdwatchers, as millions of birds travel southward. This period, spanning late summer to early fall, sees species like warblers, tanagers, and orioles passing through. Birds of prey, such as hawks and eagles, are also common during this time. The Great Lakes shoreline becomes a critical stopover for waterfowl and songbirds, offering abundant food and shelter. Key hotspots include places like Whitefish Point and Tawas Point, where birders can witness large concentrations of migratory species. Fall migration highlights the importance of Michigan’s ecosystems in supporting birds during their journey to warmer climates.
4.4. Winter Residents
Michigan’s winter bird community includes hardy species adapted to cold climates. Birds like the Black-capped Chickadee, American Crow, and Downy Woodpecker remain year-round, relying on seeds, suet, and insects. Waterfowl such as Mallards and Black Ducks can be found in open water areas like rivers and lakeshores. Snowy Owls occasionally visit from the Arctic, while species like the Common Redpoll and Snow Bunting appear during irruptions. These birds exhibit unique behaviors, such as flocking together for foraging and protection. Winter residents play a crucial role in Michigan’s ecosystem, maintaining insect populations and seed dispersal. Their presence offers birders a chance to observe adaptations to harsh winter conditions in diverse habitats.
Popular Bird Species in Michigan
Michigan is home to a wide variety of bird species, attracting enthusiasts year-round. Its diverse ecosystems support both migratory and resident birds, offering vibrant plumage and unique behaviors to observe.
5.1. Year-Round Residents
Michigan is home to a variety of bird species that remain in the state throughout the year. These birds adapt to seasonal changes, foraging for food and shelter during harsh winters. Common year-round residents include the American Crow, Black-capped Chickadee, and Blue Jay, known for their bold colors and intelligent behavior. The Downy Woodpecker and Tufted Titmouse are frequent visitors to backyard feeders, while the White-breasted Nuthatch and Northern Cardinal add vibrant plumage to winter landscapes. These birds often nest in deciduous or mixed forests, urban areas, or even residential neighborhoods. Their presence provides consistent opportunities for birders to observe and study their behaviors year-round.
5.2. Migratory Visitors
Migratory birds bring vibrant diversity to Michigan’s skies each year. Species like warblers, tanagers, and orioles flock to the state during spring migration, while hawks, eagles, and waterfowl dominate fall skies.
These visitors rely on Michigan’s strategic location along major flyways, making it a critical stopover for rest and refueling. Some birds, like the Ruby-throated Hummingbird, pass through solely during migration, never staying to breed. This transient presence creates thrilling opportunities for birders to spot rare or uncommon species. Migratory birds also play essential roles in Michigan’s ecosystems, contributing to pollination, seed dispersal, and pest control. Their journeys highlight the interconnectedness of habitats across North America, making Michigan a key link in their survival and success.
5.3. Rare and Endangered Species
Michigan is home to several rare and endangered bird species, including the Kirtland’s Warbler and the Piping Plover. These birds face threats like habitat loss and climate change. Conservation efforts, such as habitat restoration and protected nesting sites, are critical to their survival. The Kirtland’s Warbler, once nearly extinct, has shown signs of recovery due to dedicated management. Meanwhile, the Piping Plover remains vulnerable, with only a few nesting pairs along Lake Michigan’s shores. Other rare species, like the Whooping Crane, occasionally appear in the state. Protecting these birds requires collaboration between state agencies, organizations, and the public to ensure their populations thrive. Continued advocacy and research are essential for their long-term survival.
Bird Identification Tips
Michigan birds showcase remarkable diversity. Identification relies on size, shape, plumage details, and behavioral traits. Observing these characteristics, along with bird calls and seasonal variations, enhances accurate identification and enriches birding experiences.
6.1. Using Field Marks
Identifying birds in Michigan often relies on field marks, which are distinctive physical features. These include plumage patterns, beak shapes, and tail lengths. Look for unique colors, stripes, or spots that set species apart. Size and posture can also be telling, as some birds have distinct silhouettes. Pay attention to wing bars, eye rings, and crown patterns, which are often key identifiers. Seasonal changes in plumage should be considered, as some birds molt, altering their appearance. By focusing on these field marks, birders can accurately distinguish between similar species, enhancing their ability to identify Michigan’s diverse avifauna effectively in the field.
6.2. Listening to Bird Calls
Listening to bird calls is a vital skill for identifying species in Michigan. Each bird produces unique vocalizations, from songs and chirps to whistles and trills. Understanding these sounds helps in recognizing birds, especially those that are less visible. Pay attention to the pitch, rhythm, and tone of the calls, as these can distinguish one species from another. Common sounds include the melodious songs of warblers, the distinctive “cheer” of the American Robin, and the repetitive calls of sparrows. Using field guides or apps that provide audio recordings can enhance your ability to identify birds by their calls. Experienced birders often rely on this method, as it can be more effective than visual identification. Over time, practice will improve your ability to recognize and interpret bird vocalizations, enriching your birdwatching experiences in Michigan.
Birding Hotspots in Michigan
Michigan offers diverse birdwatching opportunities across its varied landscapes. Key hotspots include Sleeping Bear Dunes, Pictured Rocks, and Seney National Wildlife Refuge, each attracting unique bird species.
7.1; National Parks and Wildlife Refuges
Michigan’s national parks and wildlife refuges are vital habitats for diverse bird species. Places like Sleeping Bear Dunes National Lakeshore and Pictured Rocks National Lakeshore offer stunning natural landscapes that attract birds such as waterfowl, songbirds, and raptors; Seney National Wildlife Refuge is renowned for its grasslands and wetlands, providing a sanctuary for migratory birds. The Detroit River International Wildlife Refuge is another key site, supporting waterfowl and shorebirds. These protected areas are essential for bird conservation and offer excellent opportunities for birdwatching. Visitors can explore trails, observe nesting sites, and experience the state’s rich avian diversity firsthand. Bring binoculars and a field guide to make the most of your visit!
7.2; Local Birding Trails
Michigan boasts an extensive network of local birding trails that cater to both seasoned birders and casual observers. These trails, often maintained by local communities or conservation groups, provide access to diverse habitats such as forests, wetlands, and shorelines. Trails like the Iron River Birding Trail and the Sleeping Bear Dunes Birding Trail offer scenic views and opportunities to spot species like the American Kestrel or the Black-capped Chickadee. Many trails are equipped with interpretive signs, bird feeders, and observation decks to enhance the birding experience; They also serve as vital connectors between larger birding routes, making Michigan a premier destination for bird enthusiasts.
Local birding trails are often free to access and provide a great way to explore Michigan’s natural beauty while enjoying its rich avifauna.
Conservation Efforts for Michigan Birds
Michigan’s conservation efforts focus on habitat preservation, research, and education to protect bird populations. Collaborative initiatives between organizations and communities aim to address climate change and human impact.
8.1. Threats to Bird Populations
Habitat loss, climate change, and pollution are major threats to Michigan’s bird populations. Urbanization and agriculture reduce natural habitats, disrupting nesting and feeding grounds. Climate change alters migratory patterns and food availability, while pesticides and plastic pollution harm bird health. Invasive species also pose a significant threat, competing for resources and altering ecosystems. Additionally, collisions with wind turbines and buildings contribute to bird mortality. These challenges highlight the urgent need for conservation efforts to protect Michigan’s avian diversity and ensure the survival of its bird species for future generations.
8.2. Local and National Conservation Initiatives
Michigan’s bird conservation efforts are supported by both local and national organizations. The Michigan Audubon Society and the Great Lakes Restoration Initiative work to protect habitats and reduce threats like pollution and climate change. National programs, such as the U.S. Fish and Wildlife Service’s migratory bird initiatives, also play a crucial role. These collaborations focus on preserving wetlands, forests, and coastal areas vital to bird populations. Citizen participation is encouraged through bird counts and habitat restoration projects, fostering a community-driven approach to conservation. Together, these efforts aim to safeguard Michigan’s avifauna for future generations while promoting biodiversity and ecosystem health.
Birding Tips and Essentials
Essential birding tips include patience, knowledge of habitats, and using binoculars. Carry a field guide for identification. Practice ethical birding to protect birds and their habitats.
9.1. Best Practices for Birdwatching
Successful birdwatching begins with patience and quiet movement to avoid startling birds. Always bring binoculars and use them responsibly. Respect birds by maintaining a safe distance to avoid stress. Stay on designated trails to protect habitats and avoid disturbing wildlife. Carry a field guide or use a birding app to aid in identification. Keep the environment clean by carrying out trash. Be mindful of nesting seasons and avoid disrupting nests. Dress appropriately for weather conditions and terrain. Early mornings and late afternoons are ideal for spotting birds. Stay observant and listen for calls, as they often reveal bird locations. Enjoy the experience responsibly to ensure the well-being of both birds and ecosystems.
9.2. Essential Gear for Birders
To fully enjoy birdwatching in Michigan, having the right gear is crucial. Binoculars are the most essential tool for observing birds at a distance. A field guide specific to Michigan’s bird species will help with identification. A spotting scope can be useful for detailed observations, especially for distant birds. A life list journal is handy for tracking sightings over time. Wear comfortable, weather-appropriate clothing and sturdy footwear for long walks. A camera or smartphone can capture memorable moments. Lastly, consider carrying bird attractants like seeds or a portable feeder to draw birds closer. These essentials will enhance your birding experience and make it more rewarding.
Resources for Michigan Birders
Michigan birders benefit from comprehensive field guides, online communities, and mobile apps. These resources provide detailed species information, real-time sightings, and identification tools, enhancing birdwatching experiences statewide.
10.1. Field Guides and Literature
Field guides are essential tools for identifying and understanding Michigan’s bird species. Popular options include the Sibley Guide to Birds and National Audubon Society Field Guide to Birds. These resources provide detailed descriptions, colorful images, and range maps to help birders recognize species accurately. Additionally, literature specific to Michigan, such as Birds of Michigan Field Guide by Stan Tekiela, offers localized insights. Many guides also include tips for identifying birds by plumage, behavior, and habitat. Online resources, like e-books and downloadable PDFs, are increasingly popular for their convenience. These materials are invaluable for both novice and experienced birders, enhancing the overall birdwatching experience in Michigan.
10.2. Online Communities and Apps
Online communities and apps have revolutionized birdwatching in Michigan. Popular platforms like Merlin Bird ID and eBird provide instant species identification and real-time sightings. Social media groups dedicated to Michigan birding offer forums for sharing experiences and tips. Apps like BirdLife and Audubon Birds enable users to track bird populations and connect with local birders. These digital tools enhance the birding experience, making it easier for enthusiasts to explore and learn about Michigan’s avifauna. Whether tracking rare species or planning trips, online resources are indispensable for modern birders.
Michigan offers a captivating world of birdlife, with its diverse habitats attracting over 400 species. From migratory wonders to year-round residents, the state’s unique geography enriches birdwatching experiences. Conservation efforts play a vital role in protecting these species and their habitats. By engaging with local birding communities and utilizing field guides, enthusiasts can deepen their appreciation for Michigan’s avian diversity. Whether you’re a seasoned birder or a curious beginner, the Great Lakes State promises endless opportunities to connect with nature’s beauty through its incredible birds.